MRTGと似たツールでcactiというのがあります。こちらはGUIからホストを登録することができ、グラフも綺麗に表示されるオススメツールです。
■net-snmp インストール
# yum install net-snmp # vi /etc/snmp/snmpd.conf ############################################################################### # # snmpd.conf: # An example configuration file for configuring the ucd-snmp snmpd agent. # ############################################################################### # # This file is intended to only be as a starting point. Many more # configuration directives exist than are mentioned in this file. For # full details, see the snmpd.conf(5) manual page. # # All lines beginning with a '#' are comments and are intended for you # to read. All other lines are configuration commands for the agent. ############################################################################### # Access Control ############################################################################### # As shipped, the snmpd demon will only respond to queries on the # system mib group until this file is replaced or modified for # security purposes. Examples are shown below about how to increase the # level of access. # By far, the most common question I get about the agent is "why won't # it work?", when really it should be "how do I configure the agent to # allow me to access it?" # # By default, the agent responds to the "public" community for read # only access, if run out of the box without any configuration file in # place. The following examples show you other ways of configuring # the agent so that you can change the community names, and give # yourself write access to the mib tree as well. # # For more information, read the FAQ as well as the snmpd.conf(5) # manual page. #### # First, map the community name "public" into a "security name" # sec.name source community #com2sec notConfigUser default public com2sec local localhost private com2sec mynetwork 192.168.12.0/24 public #### # Second, map the security name into a group name: # groupName securityModel securityName #group notConfigGroup v1 notConfigUser #group notConfigGroup v2c notConfigUser group MyROGroup v1 local group MyROGroup v2c local group MyROGroup v1 mynetwork group MyROGroup v2c mynetwork #### # Third, create a view for us to let the group have rights to: # Make at least snmpwalk -v 1 localhost -c public system fast again. # name incl/excl subtree mask(optional) #view systemview included .1.3.6.1.2.1.1 #view systemview included .1.3.6.1.2.1.25.1.1 view all included .1 80 #### # Finally, grant the group read-only access to the systemview view. # group context sec.model sec.level prefix read write notif #access notConfigGroup "" any noauth exact systemview none none access MyROGroup "" any noauth exact all none none access MyRWGroup "" any noauth exact all all none |
上記の設定が終わればnet-snmpを起動します。
# /etc/rc.d/init.d/snmpd start |
![]()
■cactiのインストール
以下のコマンドでcactiをインストールします。これは標準のyumで提供されませんのでRPMforgeを設定してください。依存関係にある必要なパッケージ ( MySQLやApache/PHPなど ) もあわせてインストールされます。
# yum install cacti mysql-server # rpm -qa | grep cacti cacti-0.8.8a-2.el6.noarch # rpm -qa | grep mysql php-mysql-5.3.3-14.el6_3.i686 mysql-libs-5.1.66-1.el6_3.i686 mysql-server-5.1.66-1.el6_3.i686 mysql-5.1.66-1.el6_3.i686 |
※RedHatEnterpriseLinux 6.0(32bit)で試したときにはphp-snmpが見つからず、yumコマンドではインストールできませんでした。ネットを検索してphp-snmp-5.3.3-14.el6_3.i686.rpmを個別にダウンロードしインストールすることでcactiのインストールが出来ました。
まず以下の手順にそってMySQLを設定します。
# vi /etc/my.cnf [mysqld] datadir=/var/lib/mysql socket=/var/lib/mysql/mysql.sock user=mysql # Disabling symbolic-links is recommended to prevent assorted security risks symbolic-links=0 default-character-set = utf8 [mysqld_safe] log-error=/var/log/mysqld.log pid-file=/var/run/mysqld/mysqld.pid [mysql] default-character-set = utf8 |
次のコマンドでmysqlを起動します。
# /etc/rc.d/init.d/mysqld start |
mysqlの初期設定を行いcacti用データベースの作成を行います。
# /usr/bin/mysqladmin -u root password 'xxxxxx' # mysql -u root -p Enter password: [ 上記で設定したパスワード ] Welcome to the MySQL monitor. Commands end with ; or \g. Your MySQL connection id is 3 Server version: 5.1.66 Source distribution Copyright (c) 2000, 2012, Oracle and/or its affiliates. All rights reserved. Oracle is a registered trademark of Oracle Corporation and/or its affiliates. Other names may be trademarks of their respective owners. Type 'help;' or '\h' for help. Type '\c' to clear the current input statement. mysql> create database cacti; Query OK, 1 row affected (0.02 sec) mysql> grant all privileges on cacti.* to cactiuser@localhost identified by 'xxxxxxx'; Query OK, 0 rows affected (0.00 sec) mysql> exit Bye |
■cactiの設定
上記で設定したパスワードをconfigファイルに反映します。
# vi /usr/share/cacti/include/config.php $database_password = "xxxxxx"; |
次に所定のSQL文を以下のコマ ンドで流し込みます。
# mysql -u cactiuser -p cacti < /usr/share/doc/cacti-0.8.8a/cacti.sql Enter password: [ 上記で設定したパスワード ] |
cactiのcron関連スクリプトが 5分ごとに実行されるのですが、コメントアウトされているのでそれを外しておきます。
# vi /etc/cron.d/cacti */5 * * * * cacti /usr/bin/php /usr/share/cacti/poller.php > /dev/null 2>&1 # /etc/rc.d/init.d/crond restart |
■apacheの設定
デフォルトではローカルホストからのみcactiにア クセスできるようになっていますので他ホストからもアクセス できるようapacheの設定を変更します。
# vi /etc/httpd/conf.d/cacti.conf

Alias /cacti    /usr/share/cacti

<Directory /usr/share/cacti/>
        <IfModule mod_authz_core.c>
                # httpd 2.4
                Require host localhost
        </IfModule>
        <IfModule !mod_authz_core.c>
                # httpd 2.2
                Order deny,allow
                Deny from all
                Allow from all
        </IfModule>
</Directory>

# /etc/rc.d/init.d/httpd start
|
■phpの設定
デフォルトのphpの設定ですとWebにアクセスする 度に以下のwarningがhttpdのerror_log に記録されます。
PHP Warning: strtotime(): It is not safe to rely on the system’s timezone settings. You are *required* to use the date.timezone setting or the date_default_timezone_set() function. In case you used any of those methods and you are still getting this warning, you most likely misspelled the timezone identifier. We selected ‘Asia/Tokyo’ for ‘JST/9.0/no DST’ instead in /usr/share/cacti/include/global_arrays.php on line 676, referer: http://xx.yy.xx.yy/cacti/graph_view.php?action=tree&tree_id=1&leaf_id=9
これを回避するために以下の設定を行います。
# vi /etc/php.ini [ 最後に追記 ] date.timezone = 'Asia/Tokyo' # /etc/rc.d/init.d/httpd restart |
■初期設定
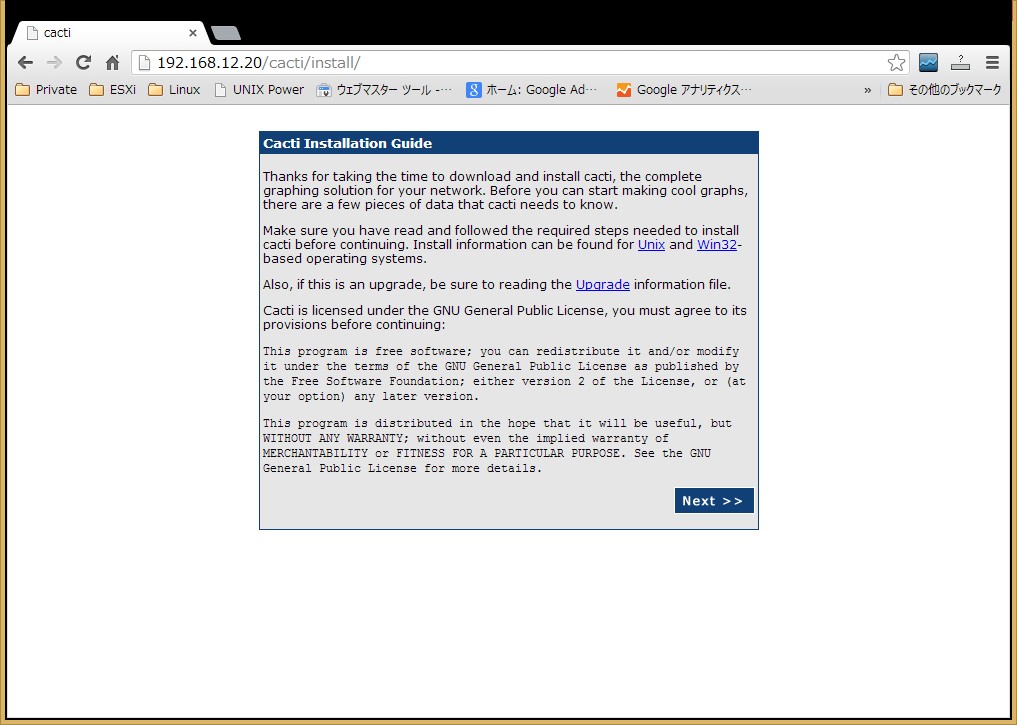
インストールは完了したので以降はブラウザから操作を行います。アクセスURLはhttp://xx.yy.xx.yy/cacti/となります。最初のアクセスでは以下の画面が表示されますので右下のNextボタンをクリックします。
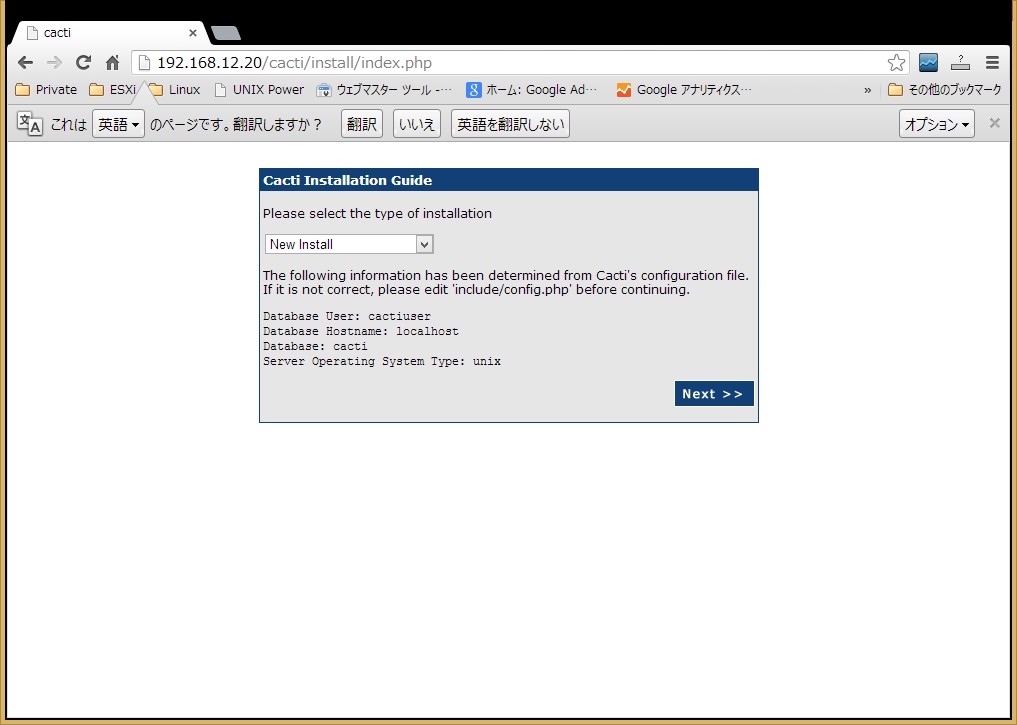
続いて以下の画面が表示されますので同様にNextボタンをクリックします。
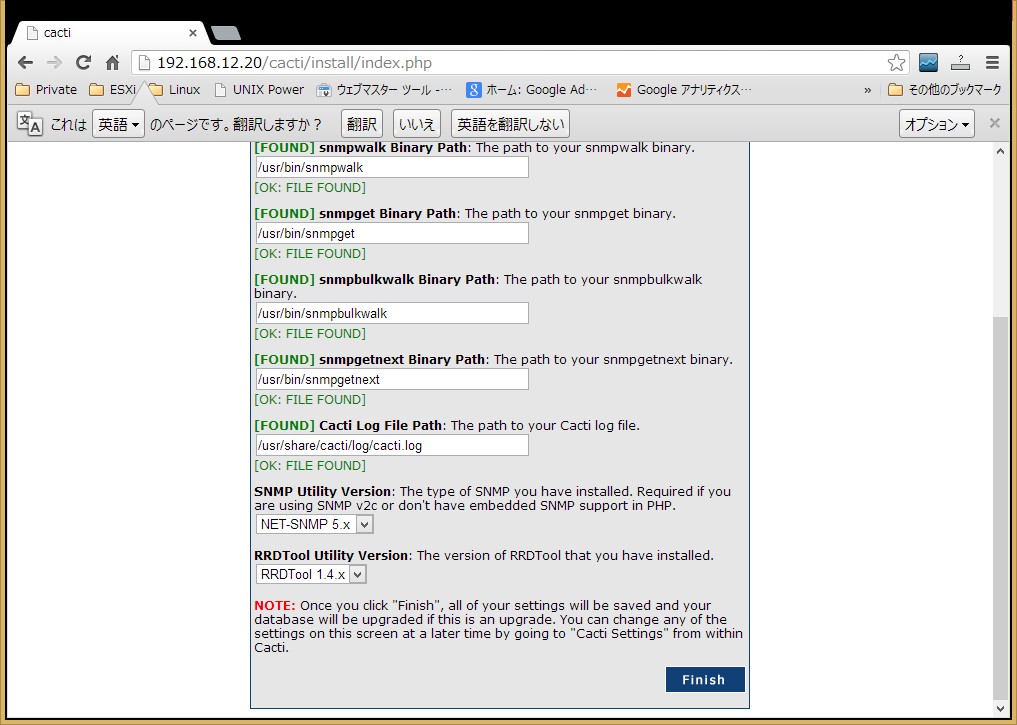
必要なコマンドが存在しているかチェックがかかり問題なければ以下のようにFILE FOUNDと表示されます。普通にyumからインストールすれば問題ないと思いますので最後にFinishボタンをクリックします。
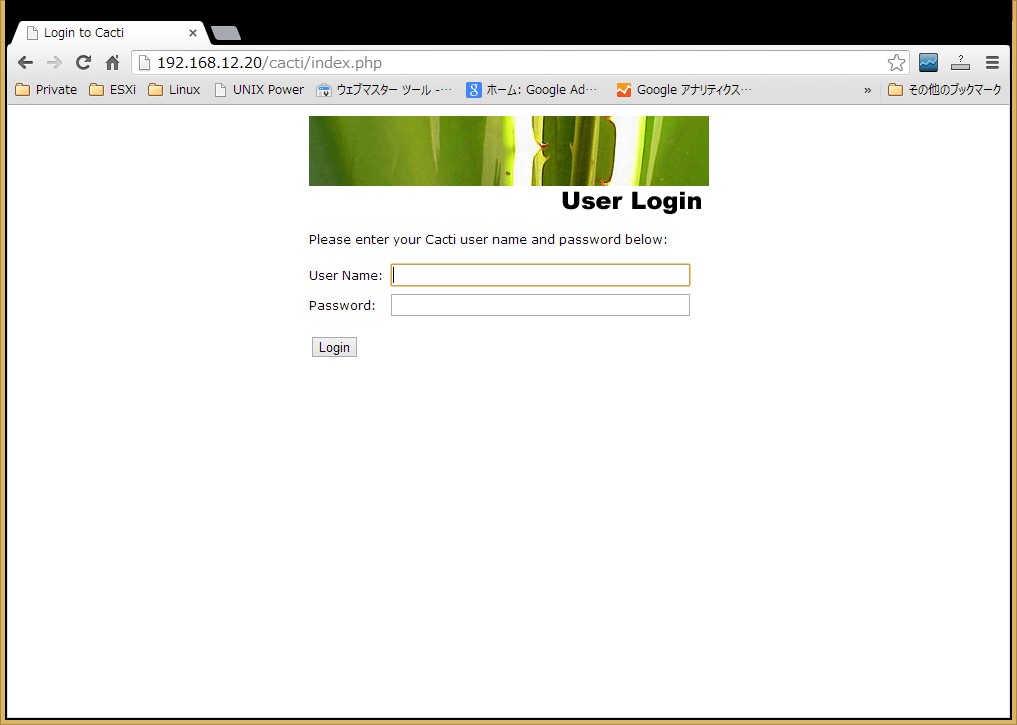
以下のようにログイン画面が表示されます。初期状態では「 admin / admin 」でログイン可能です。
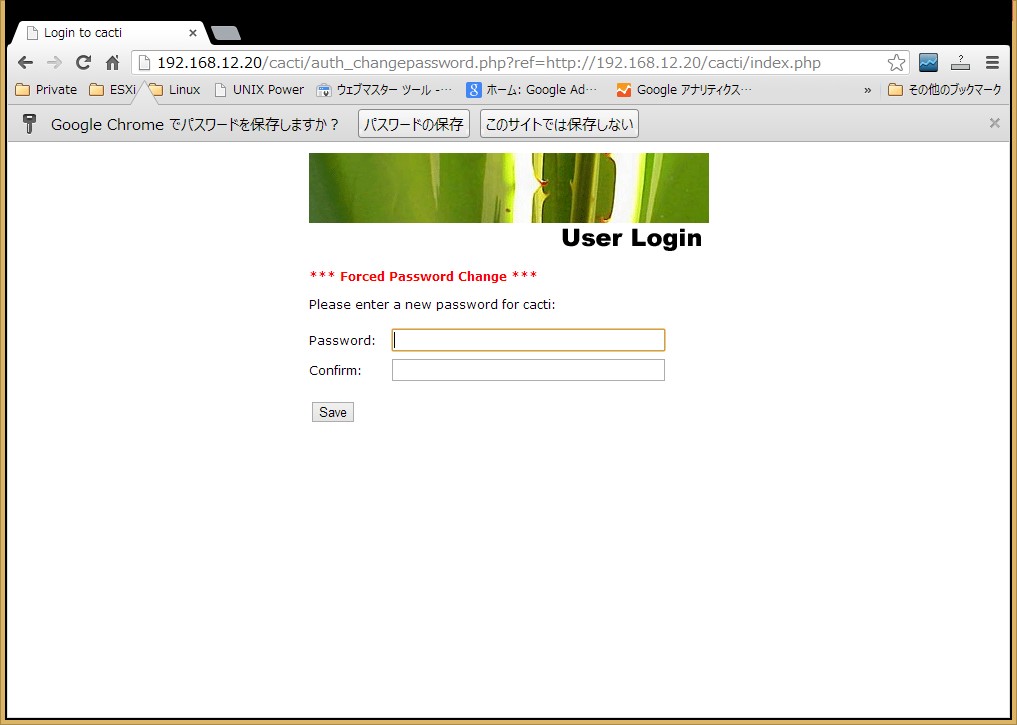
最初のログインの後、パスワードを変更するよう以下の画面が表示されますのでパスワードを設定します。
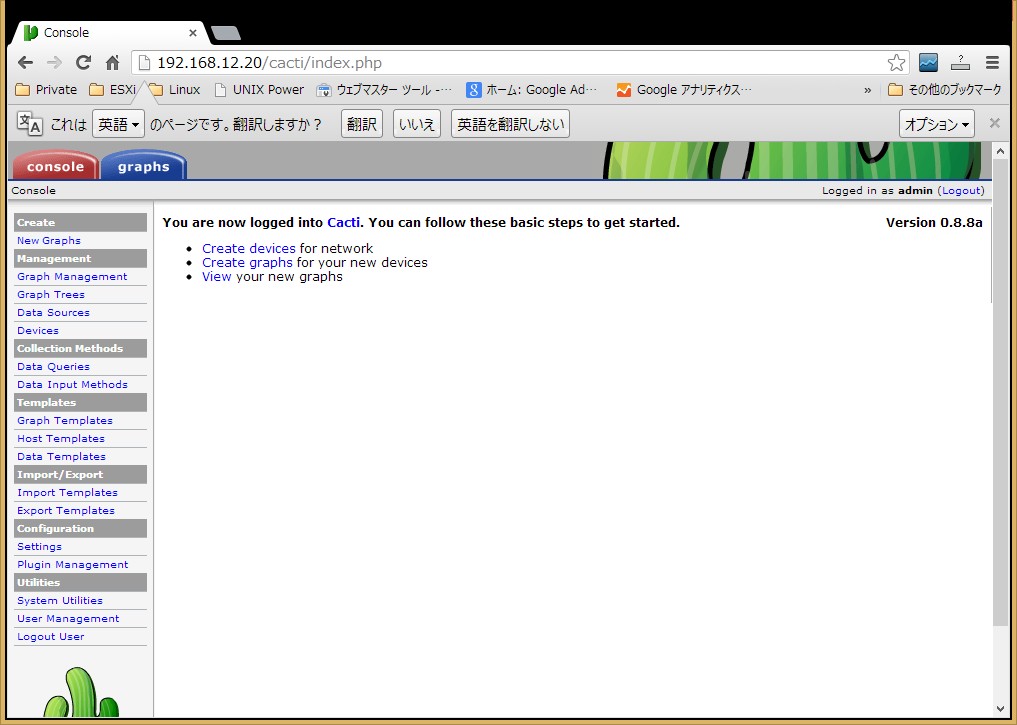
以下がログイン後の画面になります。左上のGraphsタブをクリックすると初期ではlocalhostのみが登録されています。
■監視ホストの登録
初期ではlocalhostしか登録されていませんのでルータやスイッチまたはサーバなどを登録してリソースを計測したい場合は以下の手順を踏みます。
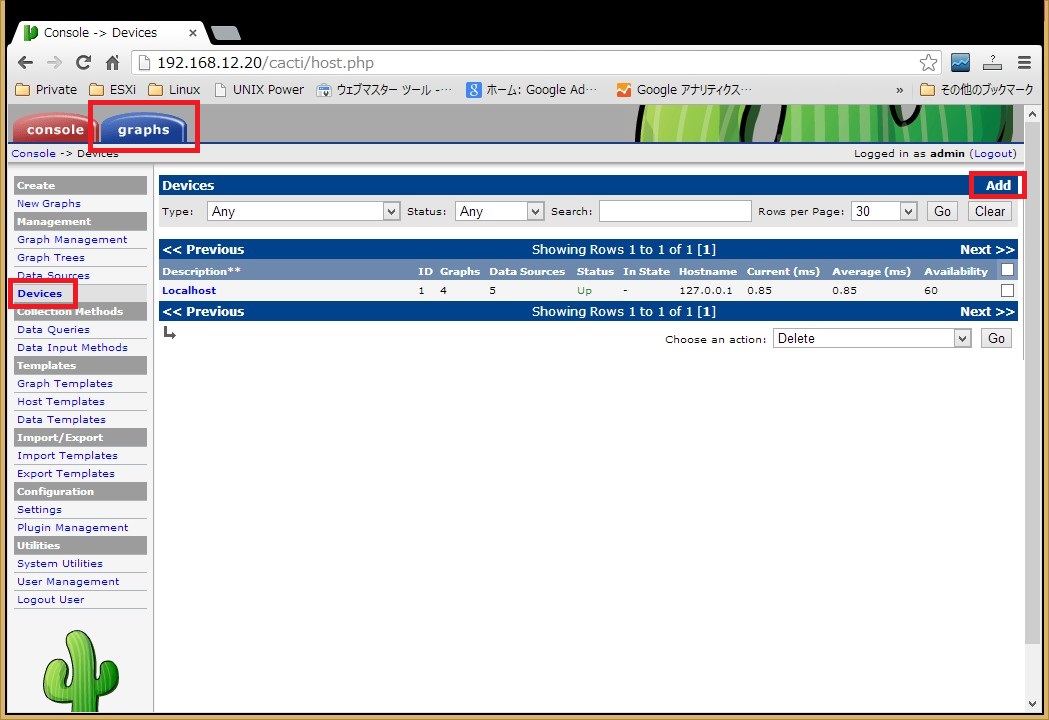
ここではLinuxサーバを登録するケースのメモ書きです。対象Linuxにはnet-snmpがインストールされ起動している状態というのが前提です。「graphs」-「Devices」を選択し、右上のAddボタンをクリックします。
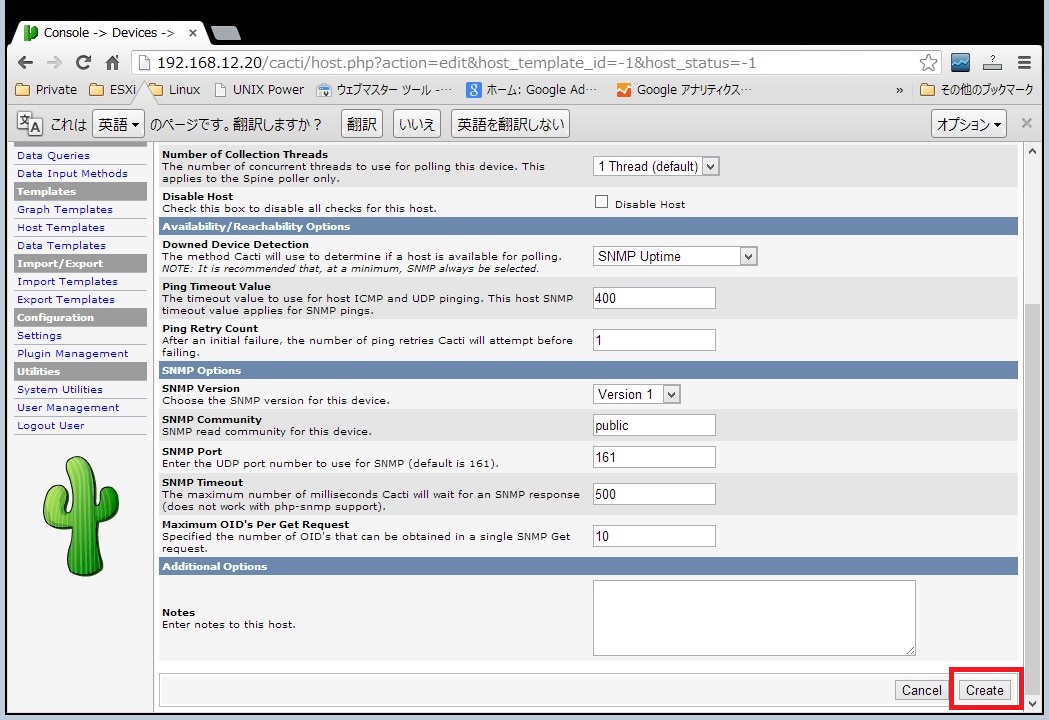
Linuxのホスト名やIPアドレス、SNMPコミュニティ名などを入力し画面右下のCreateボタンをクリックします。
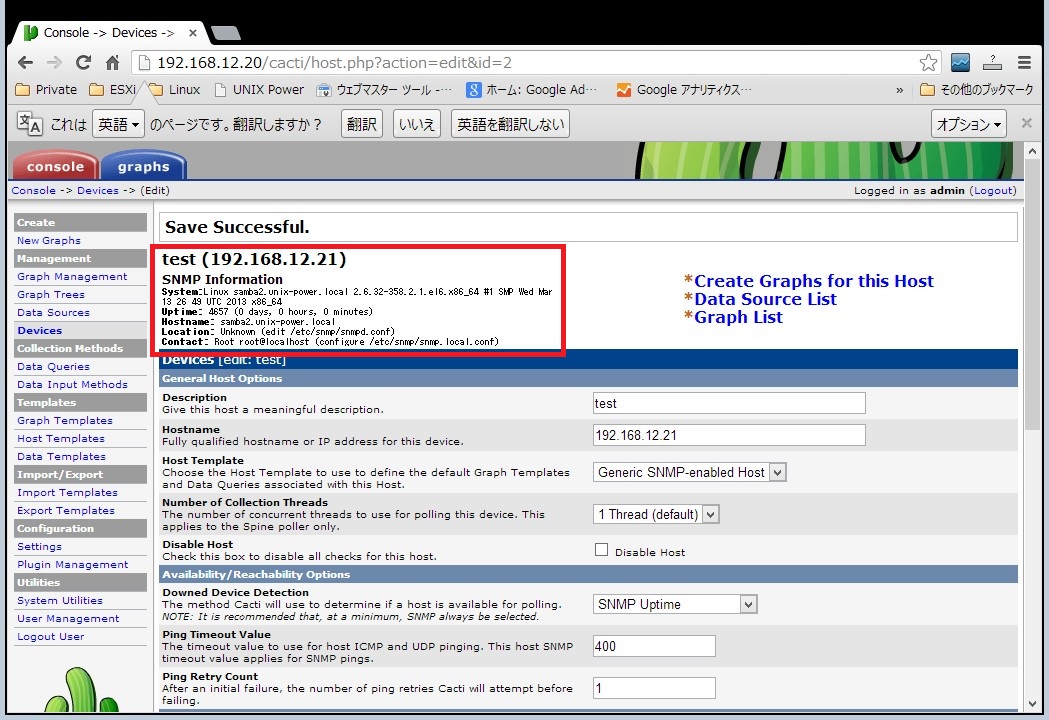
SNMPアクセスが問題なければ下記のようにホストに関する情報が表示されます。
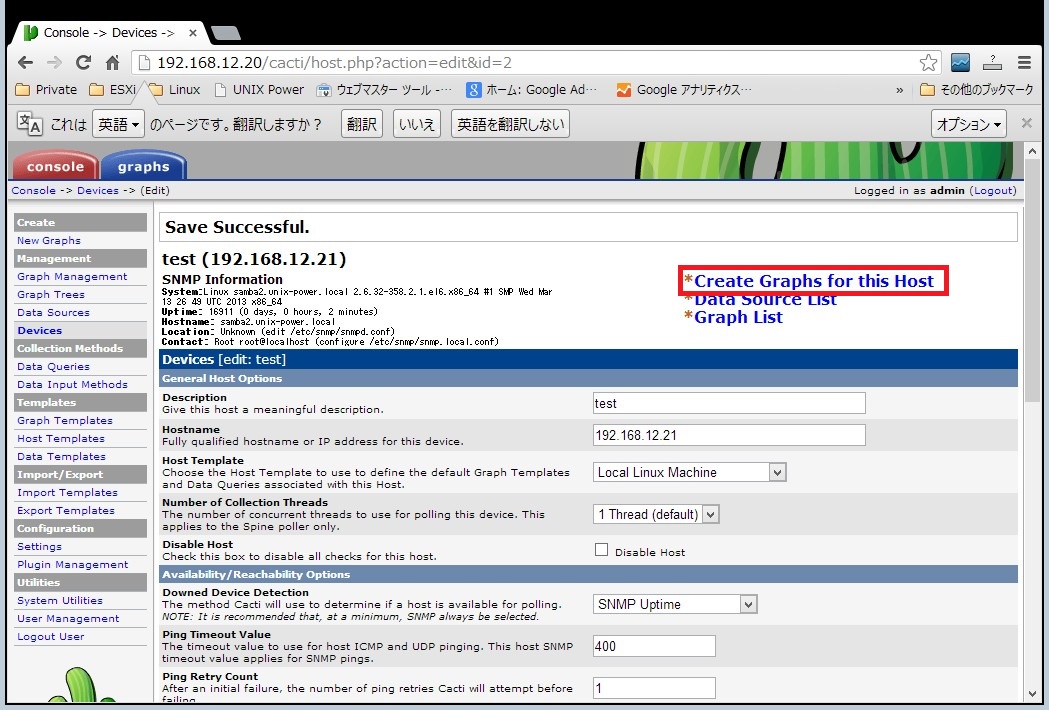
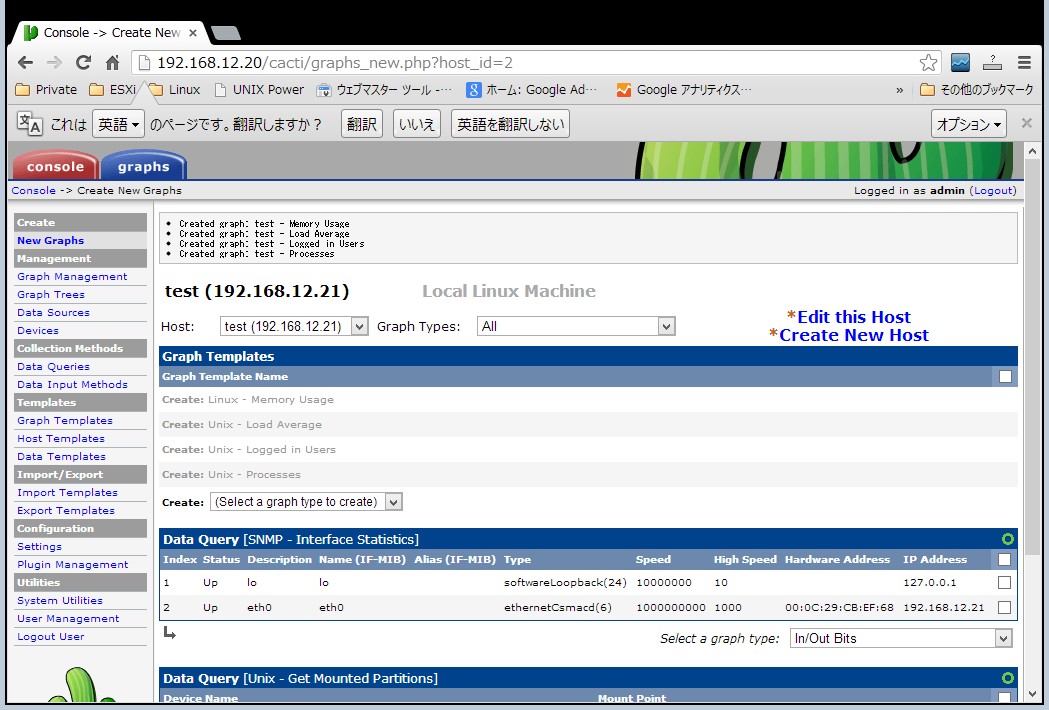
SNMPアクセスが問題ないのを確認すればグラフを生成します。「Create Graphs for this Host」リンクをクリックします。
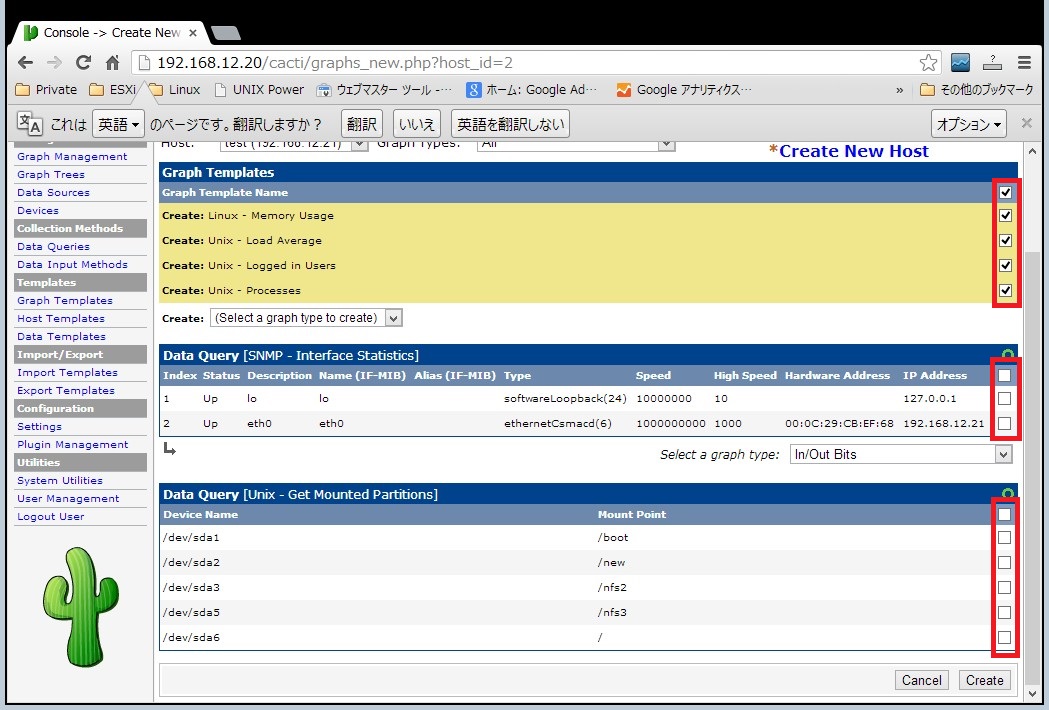
以下の画面でどの項目のグラフを生成するのか、対象とする項目の右側のチェックボックスにチェックを入れ右下のCreateボタンをクリックします。
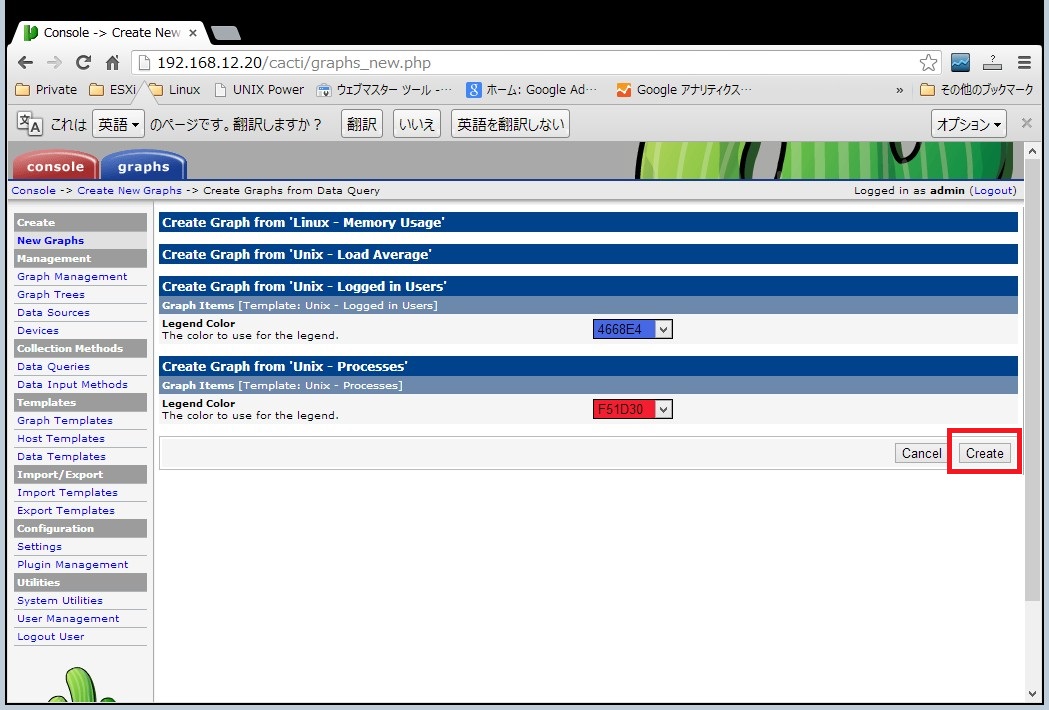
グラフの色をどうするのか確認画面が表示されます。特にこだわりがなければそのままCreateボタンをクリックします。
以下の画面が表示されてグラフの生成が開始されます。
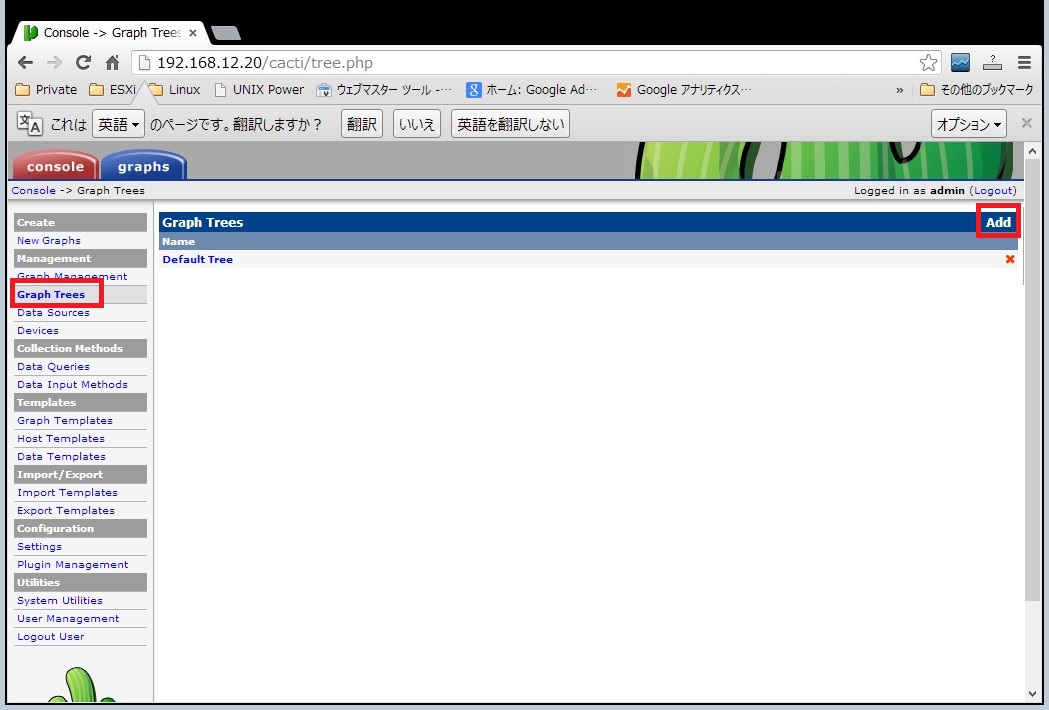
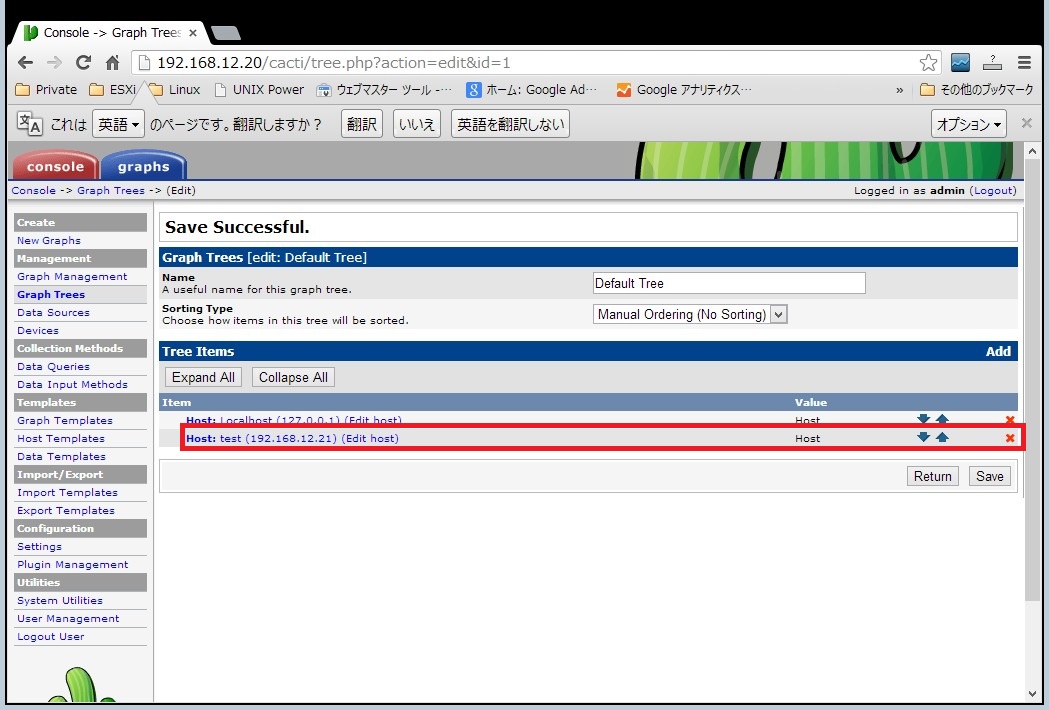
グラフを実際のツリーに追加します。左メニューの「Graph Trees」からAddボタンをクリックします。
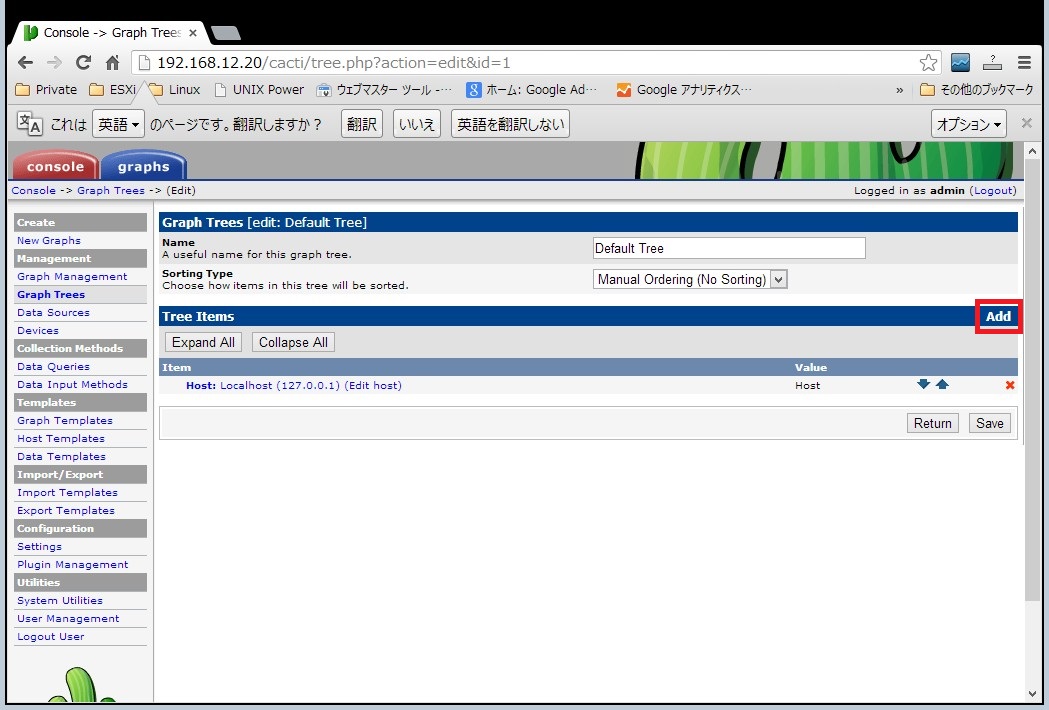
Tree Itemの右側にあるAddボタンをクリックします。
Tree Item TypeにHostを選択し、Hostに先ほど作成したホストを選択してCreateボタンをクリックします。
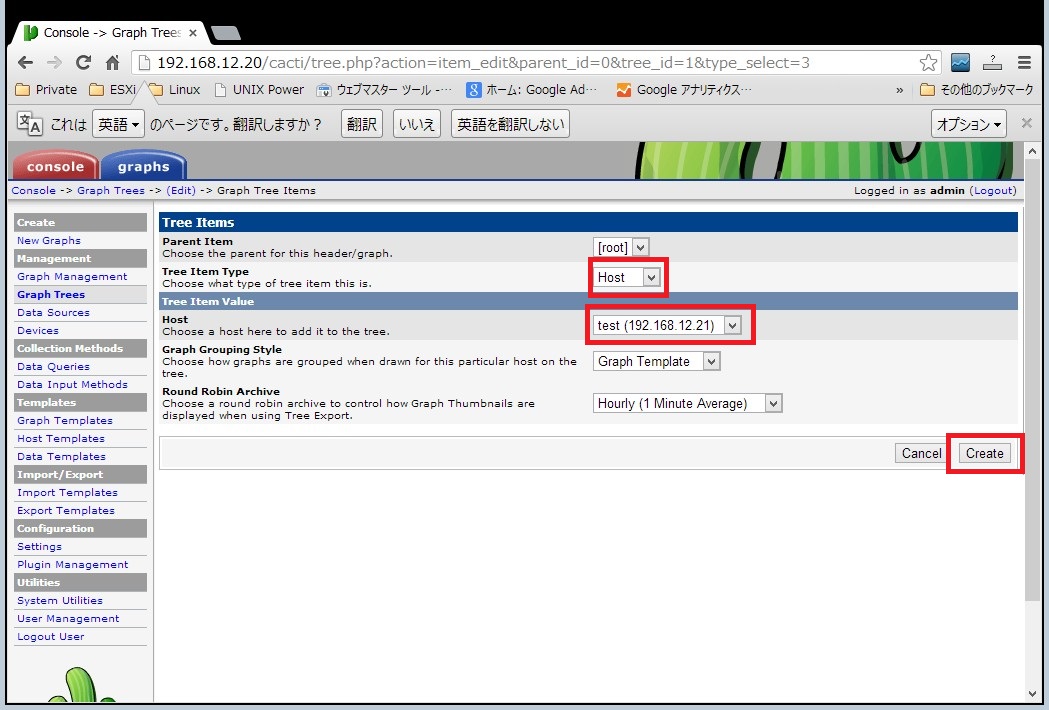
下記の画面より新規に登録されたことが確認できます。
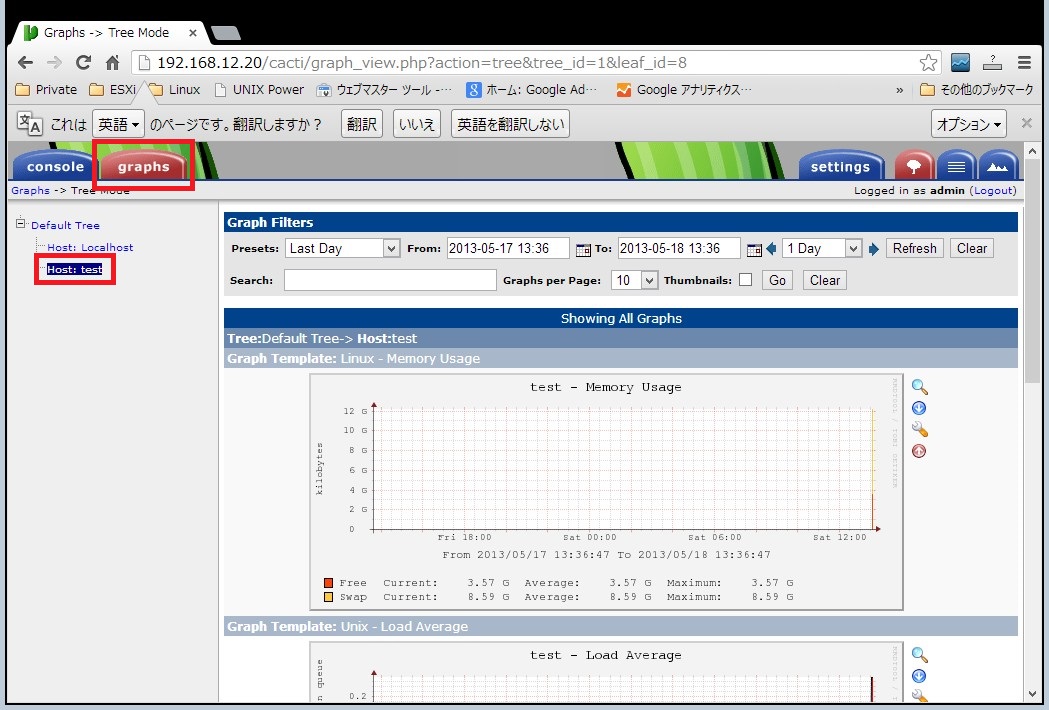
左上のgraphsから左側メニューのHostを選択すると右側の画面にグラフが閲覧できます。
標準ではcactiに限定的なテンプレートが用意されていますが、海外メーカーのネットワーク機器であれば大抵誰かがそれ用のテンプレートを作成しています。オープンソースのいいところですね。私の場合、CiscoASA / PaloAlto / WLC5508など個別にテンプレートをダウンロードしてきてインポートし活用しています。テンプレート集は下記サイトからアクセスできます。
http://www.debianhelp.co.uk/cactitemplates.htm
上記にあるものが全てというわけではなくググるとでてくるものもたくさんありますし、技術があれば自分で作成することも可能です。
■spineのインストール
デフォルトのpollerはcmd.phpというファイルで5分おきにデータを収集します。ですが、監視対象が多くなると5分では収集しきれない場合があります。そこでspineというものが用意サれており大量機器のポーリングも可能となります。
# yum install cacti-spine # vi /etc/spine.conf DB_Host localhost DB_Database cacti DB_User cactiuser DB_Pass xxxxxxxx DB_Port 3306 DB_PreG 0 |
あとはcacti側でも設定変更を行います。
「Console」 – 「Settings」 – 「Paths」 – 「Spine Poller File Path」 → 「/usr/bin/spine」を入力
「Console」 – 「Settings」 – 「Poller」 – 「Poller Type」 → 「Spine」を選択