WebMailソフトのRoundCubeをインストールします。OSはCentOS7.0です。メールサーバについてはPostfix+Dovecotを想定しており、 RoundCubeと同居を想定しております。RoundCubeはyumからインストール可能です。
# yum install roundcubemail # rpm -qa | grep roundcube roundcubemail-1.0.2-1.el7.noarch |
RoundCubeはphpで作成されており、バックエンドのDBとしてMariaDBかPostgreSQLを利用します。ここでは、MariaDBの利用を想定していますのでこれの設定を修正します。
# vi /etc/my.cnf [mysqld] datadir=/var/lib/mysql socket=/var/lib/mysql/mysql.sock # Disabling symbolic-links is recommended to prevent assorted security risks symbolic-links=0 # Settings user and group are ignored when systemd is used. # If you need to run mysqld under a different user or group, # customize your systemd unit file for mariadb according to the # instructions in http://fedoraproject.org/wiki/Systemd character-set-server=utf8 |
そして、phpの設定を実施するのに/etc/php.iniに以下を追記します。
# vi /etc/php.ini date.timezone='Asia/Tokyo' default_charset = "UTF-8" |
データを格納するためMariaDBをコマンド操作してDBを作成します。
# mysql -u root -p Enter password:[パスワード入力] Welcome to the MariaDB monitor. Commands end with ; or \g. Your MariaDB connection id is 4 Server version: 5.5.37-MariaDB MariaDB Server Copyright (c) 2000, 2014, Oracle, Monty Program Ab and others. Type 'help;' or '\h' for help. Type '\c' to clear the current input statement. MariaDB [(none)]> create database roundcubemail character set utf8 collate utf8_bin; Query OK, 1 row affected (0.00 sec) MariaDB [(none)]> grant all on roundcubemail.* to roundcubemail@localhost identified by '***'; Query OK, 0 rows affected (0.00 sec) MariaDB [(none)]> flush privileges; Query OK, 0 rows affected (0.00 sec) MariaDB [(none)]> quit Bye |
インストールされたsqlファイルを実行します。
# mysql -p roundcubemail < /usr/share/roundcubemail/SQL/mysql.initial.sql Enter password: [ 上のSQL文で設定したパスワード ] |
そしてRoundcubeの初期設定を行っていきます。これはブラウザから行うのですがデフォルトだとローカルホストからしかアクセスが出来ないようになっています。これを任意のホストからアクセスができるよう次のように設定ファイルを編集します。
# vi /etc/httpd/conf.d/roundcubemail.conf

<Directory /usr/share/roundcubemail/>
    <IfModule mod_authz_core.c>
        # Apache 2.4
        Require all granted
    </IfModule>
    <IfModule !mod_authz_core.c>
        # Apache 2.2
        Order Deny,Allow
        Deny from all
        Allow from 127.0.0.1
        Allow from ::1
    </IfModule>
</Directory>

# Define who can access the installer
# keep this secured once configured

<Directory /usr/share/roundcubemail/installer/>
    <IfModule mod_authz_core.c>
        # Apache 2.4
        Require all granted
    </IfModule>
    <IfModule !mod_authz_core.c>
        # Apache 2.2
        Order Deny,Allow
        Deny from all
        Allow from 127.0.0.1
        Allow from ::1
    </IfModule>
</Directory>
|
これらの変更を有効化するためにapacheを再起動します。
# systemctl restart httpd.service |
そしてブラウザからhttp://**.**.**.**/roundcubemail/installer/にアクセスします。
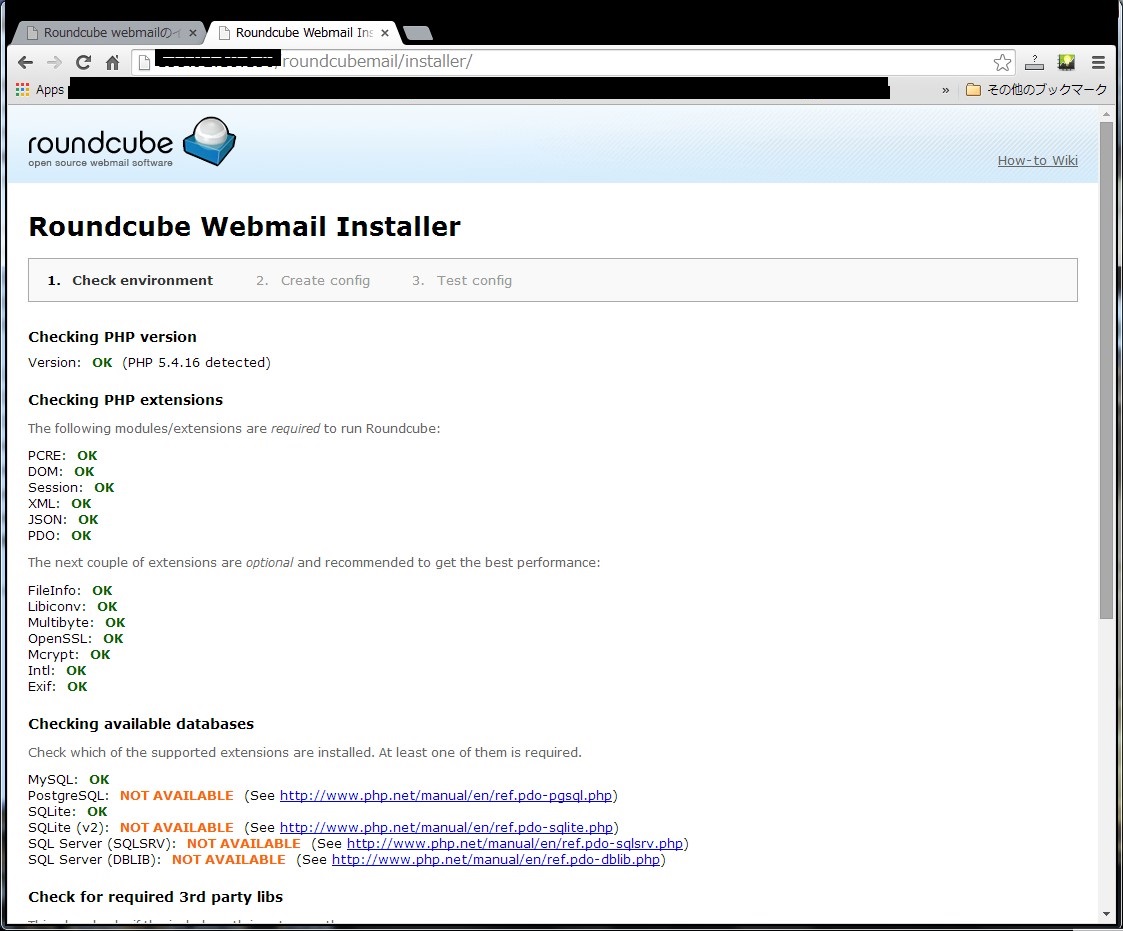
データベースやPHPに関するチェックが走ります。問題がなければOKと表示されます。チェックがOKならば画面最下部のNEXTボタンをクリックします。
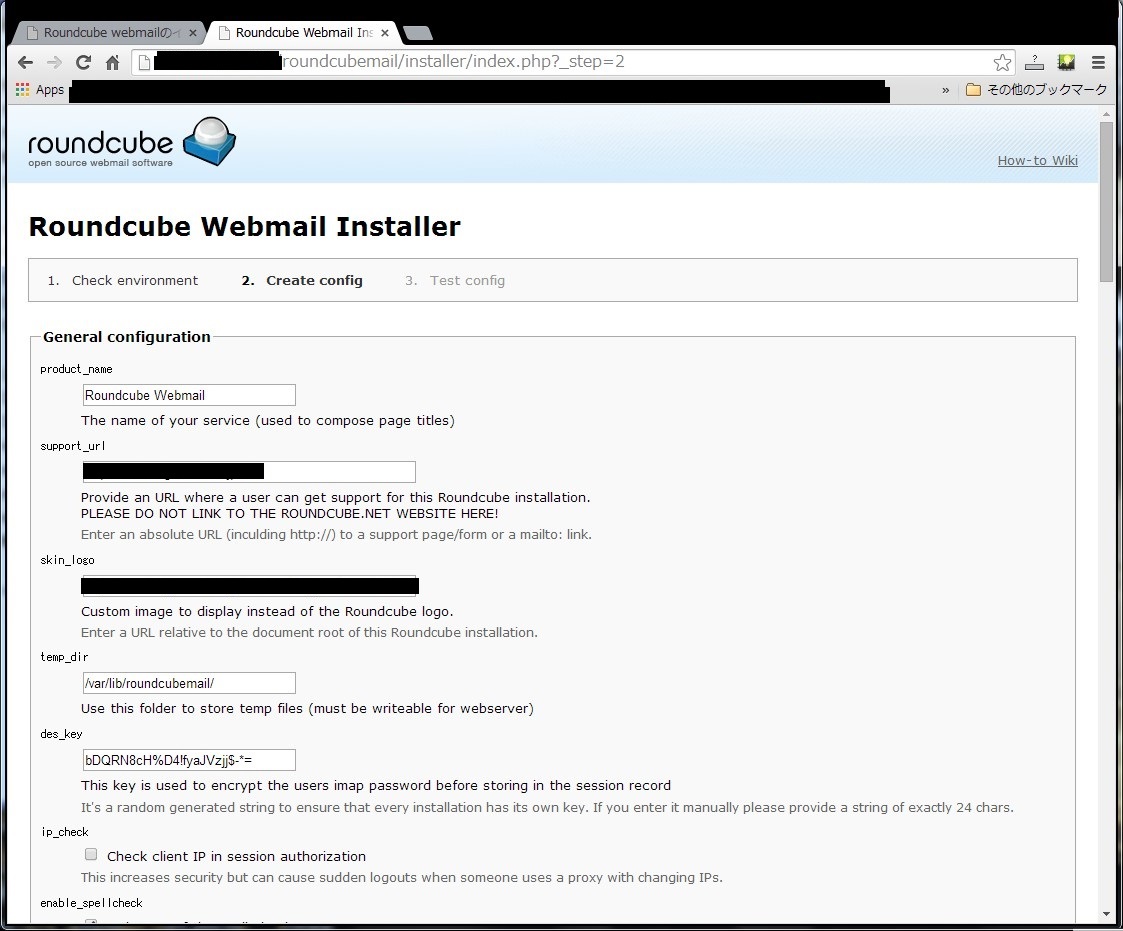
設定を入力していきます。最低限必要なのはデータベースに関する項目で「Database setup」の項目でDB Typeやサーバ名、アクセスする際のユーザ名、パスワードなどを入力してください。入力が完了すれば画面最下部のcreate configボタンをクリックしてください。
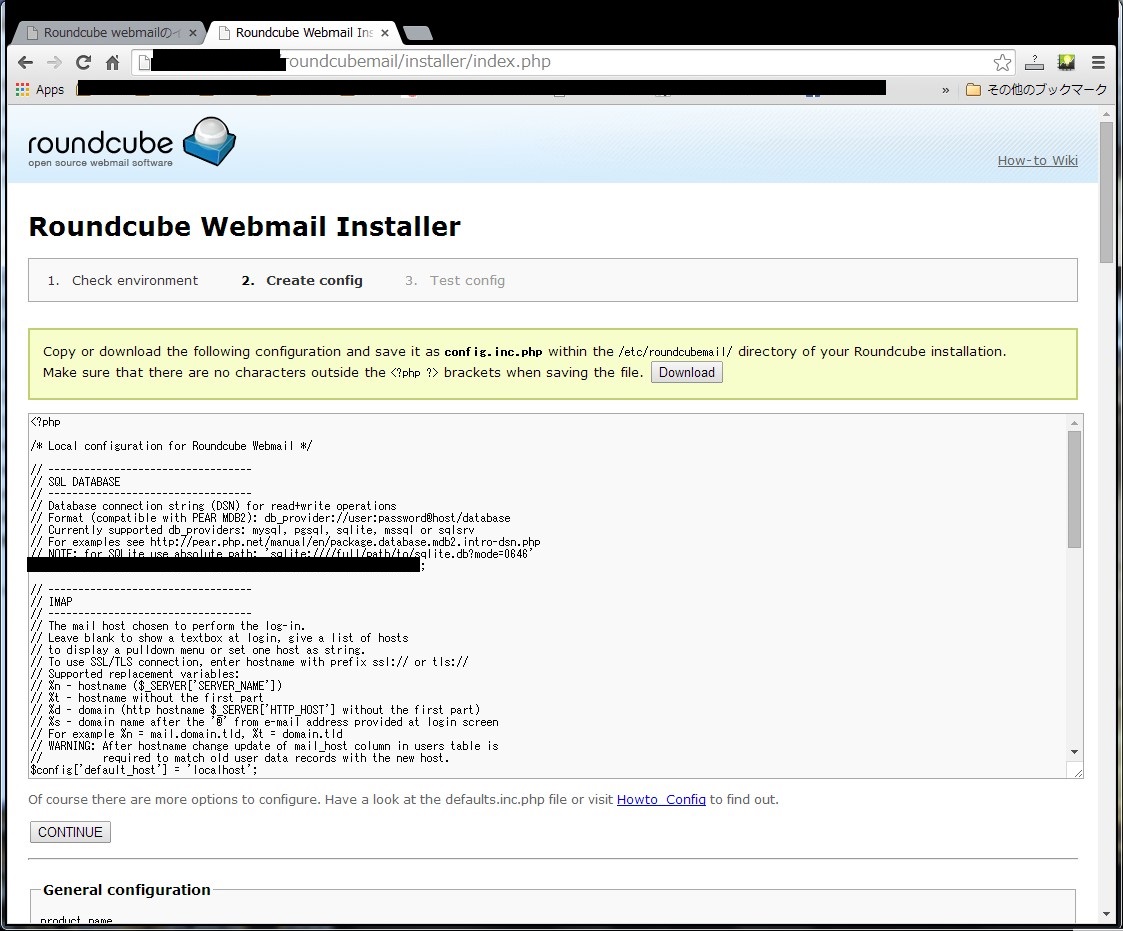
設定ファイルが作成されますので、Downloadボタンをクリックしてconfig.inc.phpファイルを/etc/roundcubemailに設置してください。その後、continueボタンをクリックします。
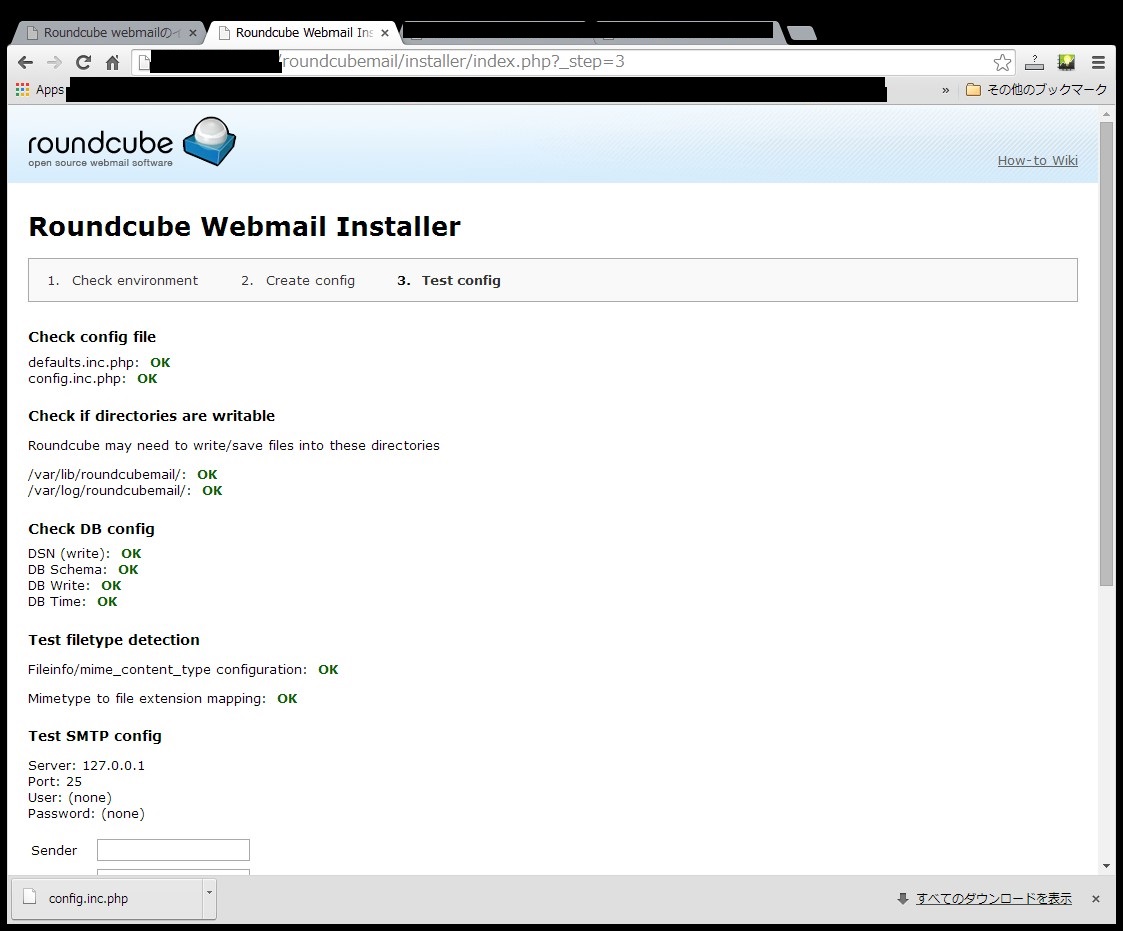
上記のようにOKが表示されていれば設定的にも問題ありません。赤文字でNOT OKと出ていれば問題ありということなのでその部分を見直すようにしてください。これで初期設定は完了となります。installerは不要となりますので削除しておいて問題ありません。
続けて上記の画面では設定できない細かい設定を追加しておきます。これは/etc/roundcubemail/defaults.inc.phpに対して行います。以下は編集箇所のみ記載しています。
# vi /etc/roundcubemail/defaults.inc.php // ---------------------------------- // LOGGING/DEBUGGING // ---------------------------------- $config['log_driver'] = 'syslog'; # ログを/var/log/roundcubemail配下ではなくsyslog経由にする $config['smtp_log'] = true; # smtpのログを/var/log/messagesに記録する $config['log_logins'] = true; # ログイン履歴を/var/log/messagesに記録する <省略> // ---------------------------------- // SYSTEM // ---------------------------------- $config['mail_domain'] = 'unix-power.net'; # デフォルトのfromアドレスドメインを設定する <省略> // ---------------------------------- // USER PREFERENCES // ---------------------------------- $config['default_charset'] = 'ISO-2022-JP'; $config['timezone'] = '+9'; $config['language'] = 'ja_JP'; |
基本設定は以上となります。
見た目が非常に美しく、但し、機能的にはシンプルなRoundCubeですが機能を追加できるプラグインが多数用意されています。具体的に以下のページでプラグインを確認可能です。
http://trac.roundcube.net/wiki/Plugin_Repository
非常にたくさんのプラグインが用意されていますが、どれが何をするためのものなのか理解できておりません。RoundCubeを利用する上でこれはあったほうが便利と思ったフィルタリングプラグインについて下記に記載します。
■managesieve filter
メールのフィルタリングのプラグインです。メーラーなどでは普通に使う機能なのでRoundCubeにも実装してみたいと思います。まず必要なパッケージをインストールしておきます。
# yum install dovecot-pigeonhole # rpm -qa | grep dovecot dovecot-2.2.10-4.el7_0.1.x86_64 dovecot-pigeonhole-2.2.10-4.el7_0.1.x86_64 |
上記とRoundCubeを連携するのですが、連携を行うプラグインに関しては新規にインストールする必要はなく標準でインストールされているので、設定を編集するのみでOKです。まずプラグインの設定ファイルを編集します。managesieve_auth_typeがデフォルトでnullとなっていますのでこれをPLAINに変更します。
# cd /usr/share/roundcubemail/plugins/managesieve/ # mv config.inc.php.dist config.inc.php # vi config.inc.php // authentication method. Can be CRAM-MD5, DIGEST-MD5, PLAIN, LOGIN, EXTERNAL // or none. Optional, defaults to best method supported by server. $config['managesieve_auth_type'] = PLAIN; |
続いてRoundCube本体のプラグインの設定でmanagesieveを有効にします。デフォルトだとarrayの中身はblankとなっていますが、ここにmanagesieveを追記します。
# vi /etc/roundcubemail/config.inc.php

// ----------------------------------
// PLUGINS
// ----------------------------------
// List of active plugins (in plugins/ directory)
$config['plugins'] = array('managesieve');
|
実際にメールを振り分ける実体はPostfixとDovecotになりますのでこれらにも設定変更が必要となります。まずPostfixで設定を変更します。
# vi /etc/postfix/main.cf mailbox_command = /usr/libexec/dovecot/deliver |
続いてDovecotの設定ファイルを編集します。これは複数のファイルを編集する必要があります。まず20-managesieve.confを編集します。この設定ファイルは主にコメントになっている設定をコメントアウトする形となります。
# vi /etc/dovecot/conf.d/20-managesieve.conf


# Uncomment to enable managesieve protocol:
protocols = $protocols sieve

# Service definitions

service managesieve-login {
  inet_listener sieve {
    port = 4190
  }

  inet_listener sieve_deprecated {
    port = 2000
  }

  # Number of connections to handle before starting a new process. Typically
  # the only useful values are 0 (unlimited) or 1. 1 is more secure, but 0
  # is faster. <doc/wiki/LoginProcess.txt>
  service_count = 1

  # Number of processes to always keep waiting for more connections.
  process_min_avail = 0

  # If you set service_count=0, you probably need to grow this.
  vsz_limit = 64M
}
|
続いて15-lda.confを編集します。
# vi /etc/dovecot/conf.d/15-lda.conf

protocol lda {
  # Space separated list of plugins to load (default is global mail_plugins).
  mail_plugins = $mail_plugins sieve
}
|
続いて20-lmtp.confを編集します。
# vi /etc/dovecot/conf.d/20-lmtp.conf

protocol lmtp {
  # Space separated list of plugins to load (default is global mail_plugins).
  mail_plugins = $mail_plugins sieve
}
|
設定としては以上になります。あとはRoundCubeからログインし、設定画面のところにフィルターという項目が追加されます。FromやSubjectなど条件を指定して特定のアクションを指定します。
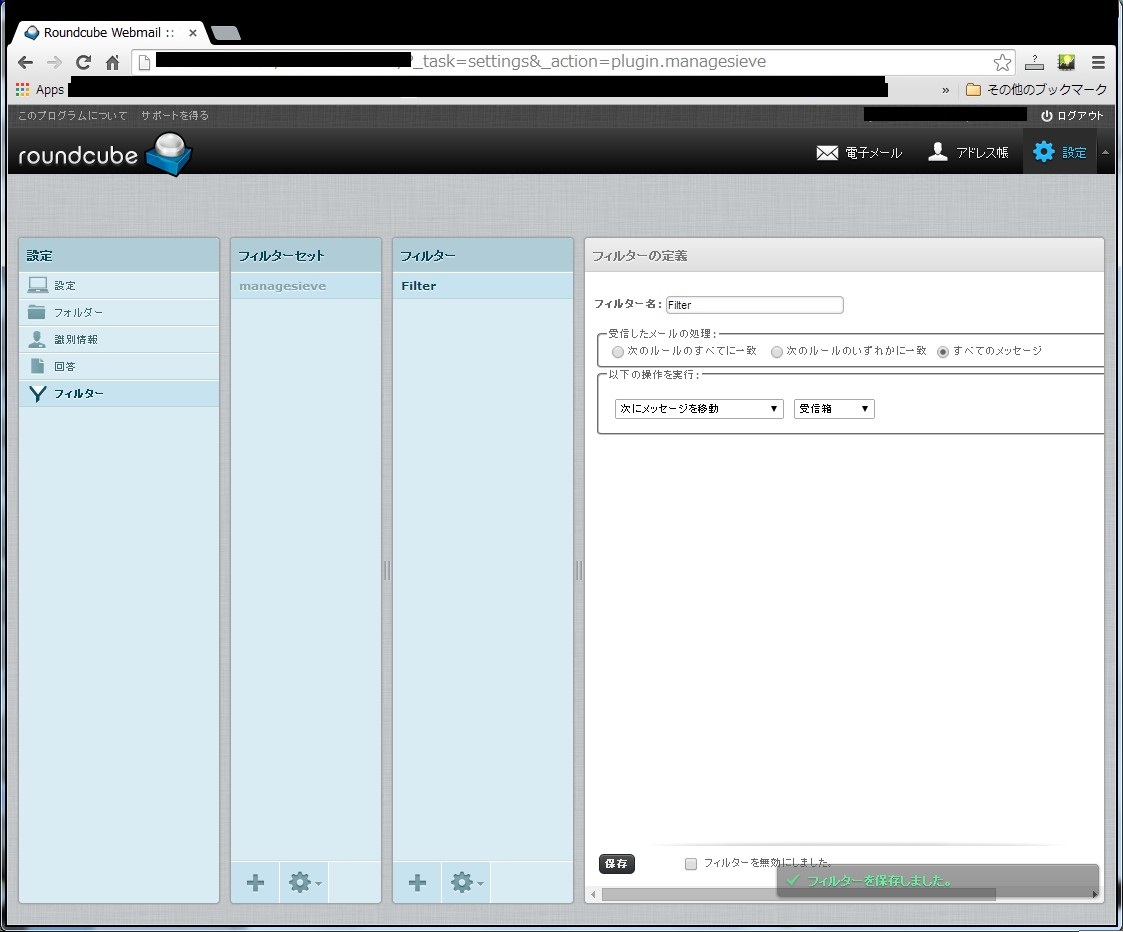
上記のフィルターセットのところにmanagesieveという項目がありますが、微妙に文字色が灰色となっています。これは無効化されているという意味であり、有効にすると黒色に変わります。最初これに気づかず設定しても有効にならないということではまってしまいました。皆様もお気をつけください。