CentOS7にメールマガジン配信システムのPHPListをインストールしてみます。
元々、メールマガジン配信が目的ではなく、アンケートなどの数百通にのぼる一斉配信メールを通常のメーラーで行うのがナンセンスだと感じ、また、BCCで送らずTOで全員アドレスを送ってしまうというセキュリティ事故を防ぐ目的もありました。
まず、WebサーバやDBサーバなど下記コマンドでインストールを行います。
# yum install httpd php php-mbstring php-mysql openssl mariadb mariadb-server |
WebサーバとDBサーバを有効にし、自動起動をonにします。
# systemctl enable mariadb # systemctl enable httpd # systemctl start mariadb # systemctl start httpd |
次にDBサーバの初期設定を行います。
# mysql_secure_installation NOTE: RUNNING ALL PARTS OF THIS SCRIPT IS RECOMMENDED FOR ALL MariaDB SERVERS IN PRODUCTION USE! PLEASE READ EACH STEP CAREFULLY! In order to log into MariaDB to secure it, we'll need the current password for the root user. If you've just installed MariaDB, and you haven't set the root password yet, the password will be blank, so you should just press enter here. Enter current password for root (enter for none):[そのままEnter] OK, successfully used password, moving on... Setting the root password ensures that nobody can log into the MariaDB root user without the proper authorisation. Set root password? [Y/n] Y New password:[rootパスワードを入力] Re-enter new password:[rootパスワードを入力] Password updated successfully! Reloading privilege tables.. ... Success! By default, a MariaDB installation has an anonymous user, allowing anyone to log into MariaDB without having to have a user account created for them. This is intended only for testing, and to make the installation go a bit smoother. You should remove them before moving into a production environment. Remove anonymous users? [Y/n] Y ... Success! Normally, root should only be allowed to connect from 'localhost'. This ensures that someone cannot guess at the root password from the network. Disallow root login remotely? [Y/n] Y ... Success! By default, MariaDB comes with a database named 'test' that anyone can access. This is also intended only for testing, and should be removed before moving into a production environment. Remove test database and access to it? [Y/n] Y - Dropping test database... ... Success! - Removing privileges on test database... ... Success! Reloading the privilege tables will ensure that all changes made so far will take effect immediately. Reload privilege tables now? [Y/n] Y ... Success! Cleaning up... All done! If you've completed all of the above steps, your MariaDB installation should now be secure. Thanks for using MariaDB! |
次にDBを作成します。
# mysql -u root -p
Enter password:[rootパスワードを入力]
Welcome to the MariaDB monitor. Commands end with ; or \g.
Your MariaDB connection id is 15
Server version: 5.5.60-MariaDB MariaDB Server

Copyright (c) 2000, 2018, Oracle, MariaDB Corporation Ab and others.

Type 'help;' or '\h' for help. Type '\c' to clear the current input statement.

MariaDB [(none)]> create database phplist;
Query OK, 1 row affected (0.00 sec)

MariaDB [(none)]> grant all privileges on phplist.* to phplistuser@localhost identified by 'phplist';
Query OK, 0 rows affected (0.00 sec)

MariaDB [(none)]> flush privileges;
Query OK, 0 rows affected (0.00 sec)

MariaDB [(none)]> exit
Bye
|
次にphplist本体をダウンロードしWebからアクセスできる場所に配置します。これは日本語化されたものが以下のサイトで配布されていたのでこれを利用しました。
https://www.d-ip.jp/oss/oss-pl/
# tar xvzf phplist-3.0.8_ja_dip_20140927.tar.gz # cd phplist-3.0.8_ja_dip # mv pulic_html/lists/ /var/www/html/ # cd /var/www/html/ # chown -R apache.apache lists/ |
次にデータベースに関する必要な設定を行います。各項目を上記に合わせて設定します。
# vi lists/config/config.php

$default_system_language = "ja";
<省略>
// what is your Mysql database server hostname
$database_host = 'localhost';
// what is the name of the database we are using
$database_name = 'phplist';
// what user has access to this database
$database_user = 'phplistuser';
// and what is the password to login to control the database
$database_password = 'phplist';
// if you have an SMTP server, set it here. Otherwise it will use the normal php mail() function
//# if your SMTP server is called "smtp.mydomain.com" you enter this below like this:
//#
//#     define("PHPMAILERHOST",'smtp.mydomain.com');
define('PHPMAILERHOST', 'mail.unix-power.net');
// if TEST is set to 1 (not 0) it will not actually send ANY messages, but display what it would have sent
// this is here, to make sure you edited the config file and mails are not sent "accidentally"
// on unmanaged systems
define('TEST', 0);
<省略>
|
ここまででWebからのアクセスが可能となりますが、ApacheやPHPなどに関する必要最低限の設定は以下を参照して実施しておいてください。
上記を設定しておかないとページが真っ白になる可能性があります。
ここまで完了すればWebにアクセスしてみます。アドレスはhttp://url/lists/adminとなります。正常にアクセスすれば以下の画面が表示されます。
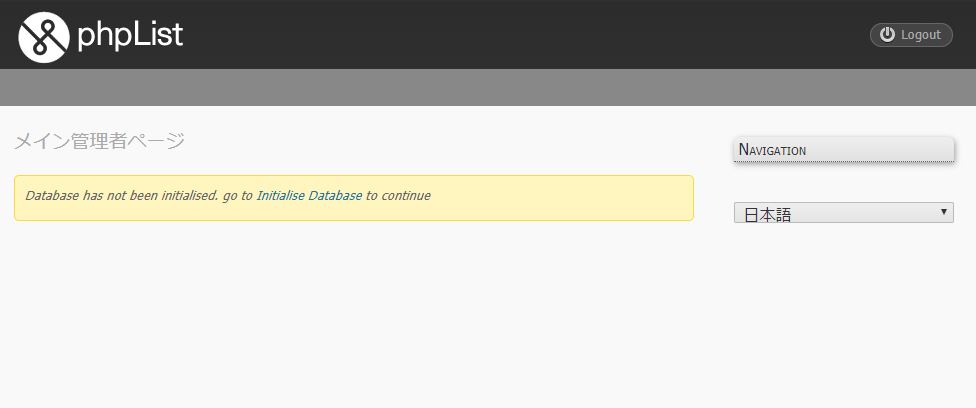
上記の「Initialise Database」リンクから初期セットアップを行います。このリンクをクリックすると下記画面が表示されます。
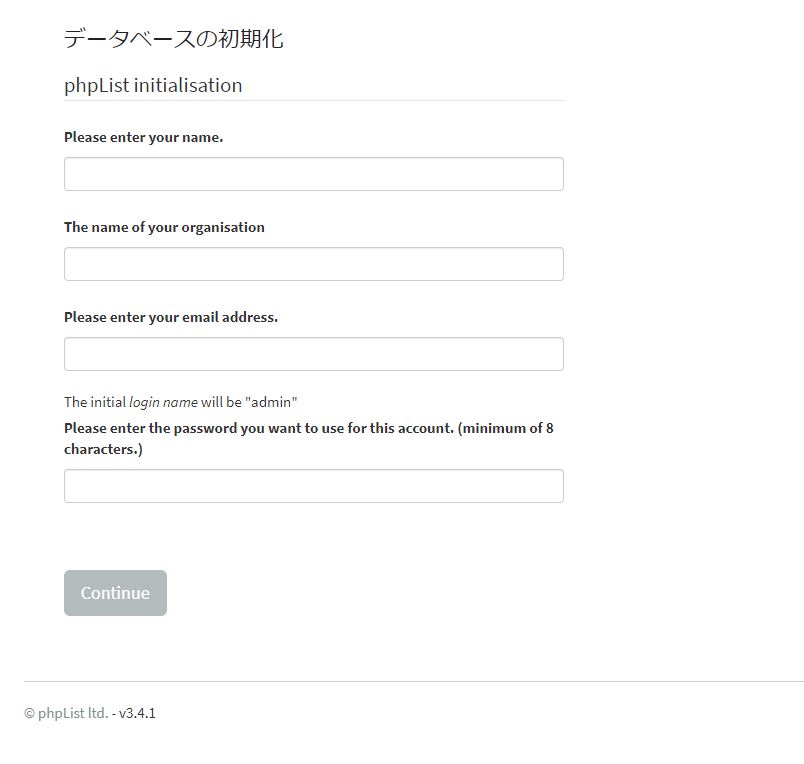
Please enter your name : 氏名を入力します。
The name of your organisation: 組織名を入力します。
Please enter your email address: メールアドレスを入力します
Please enter the password you want to use for this account: 管理者パスワード入力
入力を終えたらContinueボタンをクリックします。するとデータベースが初期化され以下の画面が表示されます。
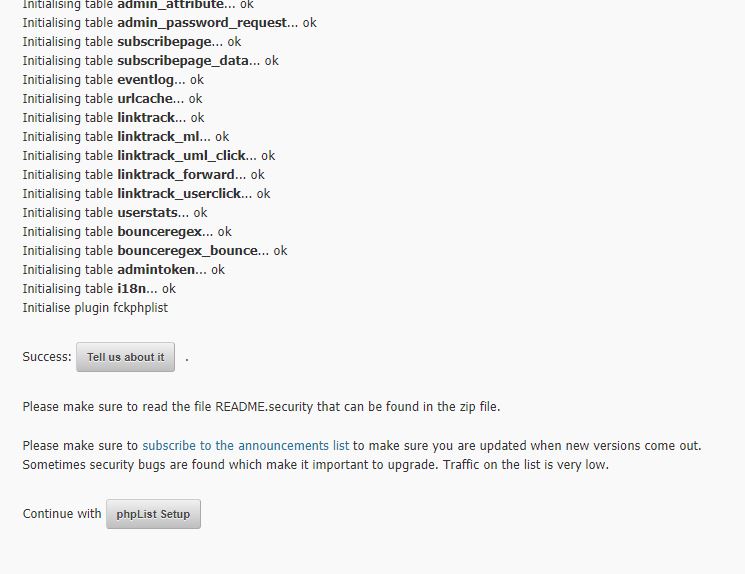
上記の最下部の「phpList Setup」ボタンをクリックすると以下の画面が表示されます。
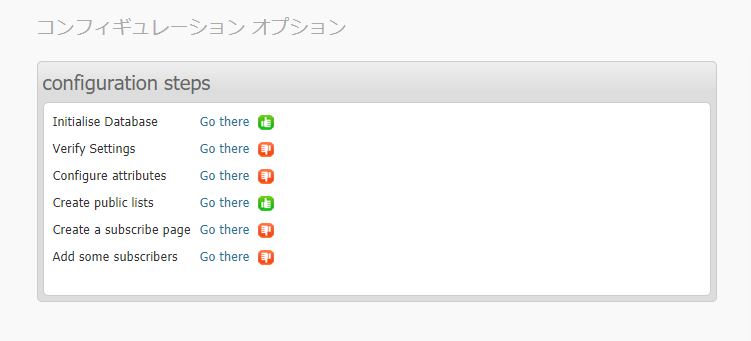
上記の中のVerify SettingsのGo thereリンクをクリックします。これはphpListの全般的な設定となります。
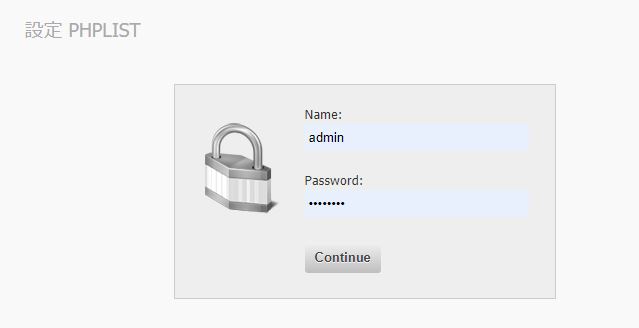
Nameはadmin、Passwordは初期セットアップで入力したパスワードになります。Continueボタンを押すと下記のような設定項目一覧が表示されます。
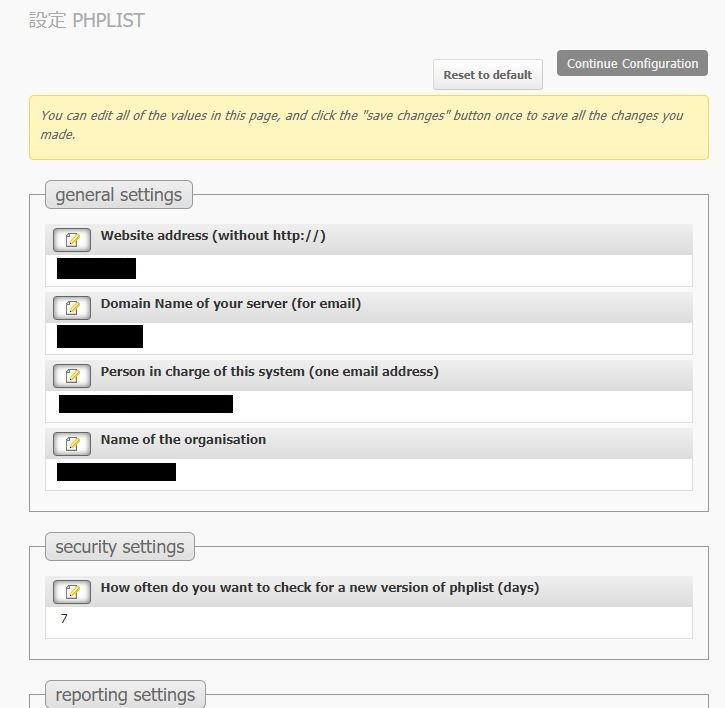
設定項目は非常に多岐に渡るのですが変更箇所は概ね管理者向けメールアドレスの定義のみです。
基本設定はこれにて完了になります。
■配信リストの作成
最もやりたかったことです。
まずは配信リストを作成します。上側メニューの「Subscribers」をクリックすると以下の画面が表示されます。

画面左下の「Add a list」ボタンをクリックします。
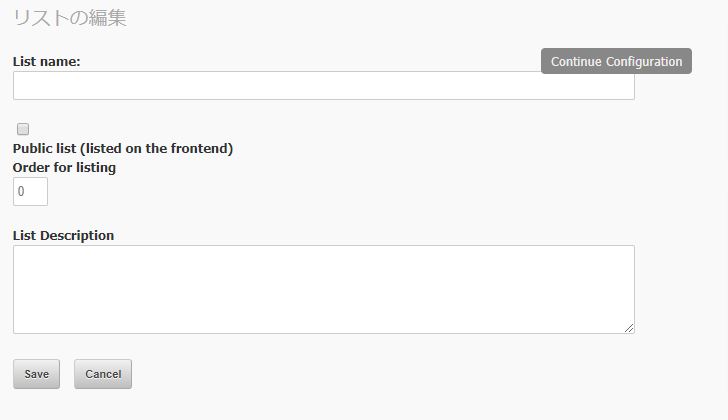
List nameに任意の名前を入力して画面左下のSaveボタンをクリックします。これで新たな配信リストが作成完了したのでこれにメンバーを追加します。
「Subscribers」の「メールマガジンリスト」を選択すると以下の画面が表示されます。

先程作成した配信リストが作成されていることを確認して、そのリストの行にある人の絵のあるアイコン(Add Members)を選択します。
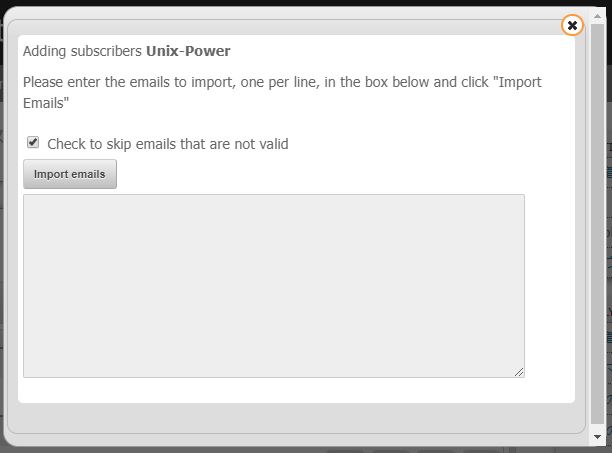
テキストエリアに1行1アドレスで追加したいメールアドレスを記載していき、Import emailsボタンをクリックします。これで配信リストが完了します。
■メールの一括配信
先程の配信リスト一覧画面から送信したいリストを選んで、その行のメール送信ボタンをクリックします。
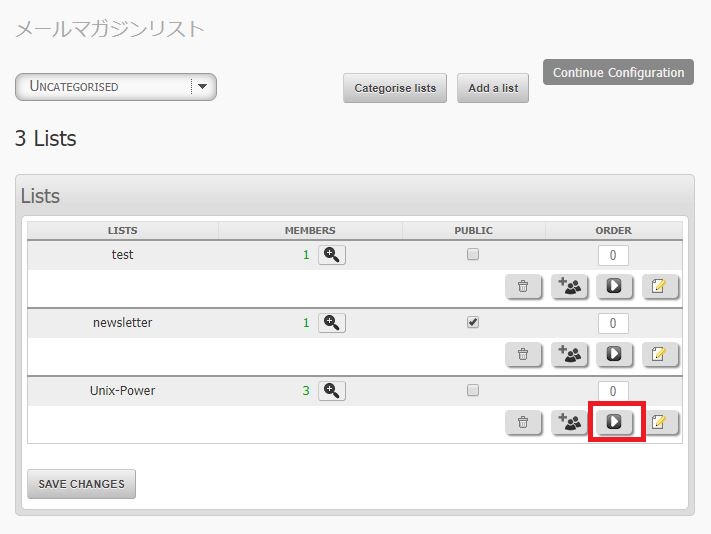
上記ボタンをクリックするとその配信リストに対してメールを送信することができます。クリック後は以下の画面が表示されます。
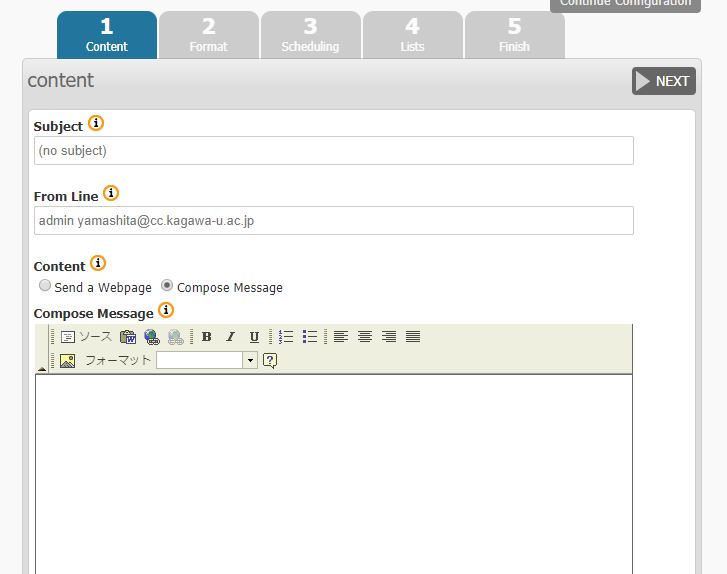
まず、Subject、Fromアドレス、本文などを入力します。入力したら画面右上のNEXTボタンをクリックします。
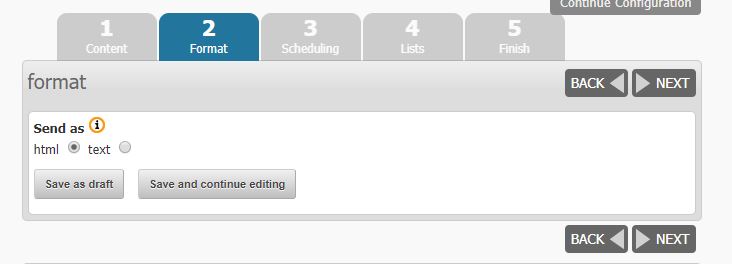
HTMLメールかtextメールかを選択します。選択したらNEXTをクリックします。
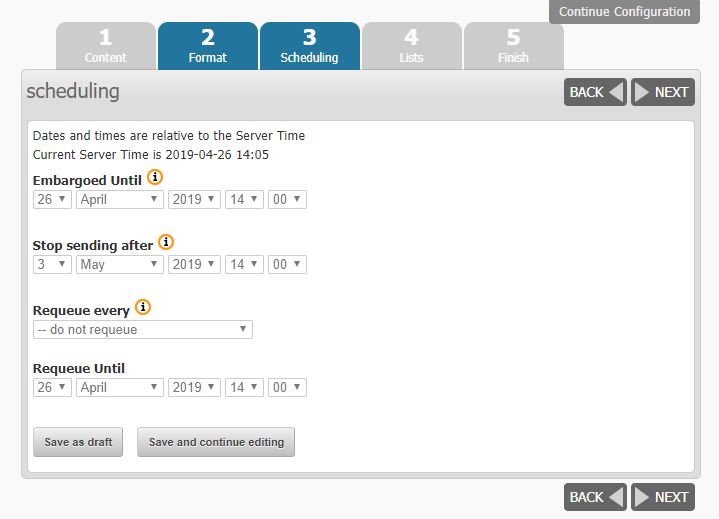
時間を指定して送信することもできますが、この機能は私は使わないので気にせずNEXT。
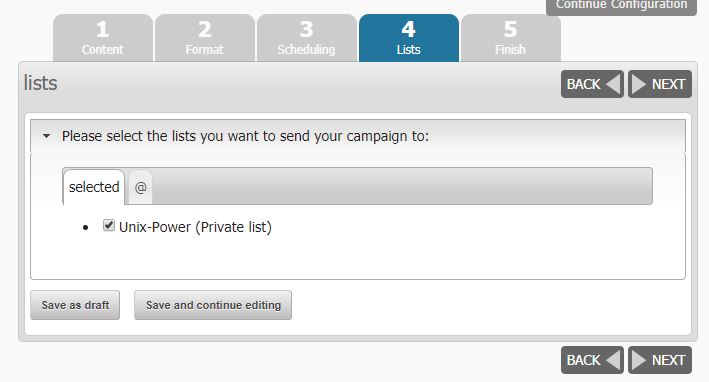
配信するリストを選択します。ここはデフォルトで最初に選んだリストにチェックが入っていると思うのでそのままNEXT。
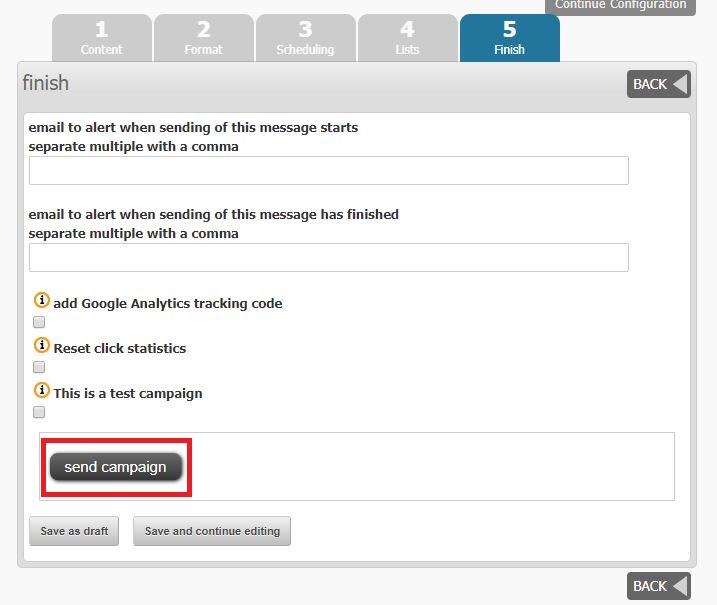
開始通知メールや終了通知メールがほしい場合はアドレスを入力します。いらない場合は入力不要です。そして最後にsend campaignでメール送信を開始します。