Moodleとはオープンソースのe-Learningシステムであり既に国内の多数の大学で授業用として活用されているソフトウェアです。このMoodleをCentOS7にインストールする際のメモ書きを残します。まず必要なソフトウェアをそれぞれインストールしていきます。
※MariaDBのインストール # yum install mariadb mariadb-server # rpm -qa | grep mariadb mariadb-server-5.5.37-1.el7_0.x86_64 mariadb-5.5.37-1.el7_0.x86_64 mariadb-libs-5.5.37-1.el7_0.x86_64 ※Apacheのインストール # yum install httpd httpd-devel mod_ssl # rpm -qa | grep httpd httpd-tools-2.4.6-18.el7.centos.x86_64 httpd-devel-2.4.6-18.el7.centos.x86_64 httpd-2.4.6-18.el7.centos.x86_64 ※PHPのインストール # yum install php php-devel php-mysql php-mbstring php-gd php-xmlrpc php-xml php-intl php-soap php-ldap # rpm -qa | grep php php-mysql-5.4.16-23.el7_0.1.x86_64 php-intl-5.4.16-23.el7_0.1.x86_64 php-common-5.4.16-23.el7_0.1.x86_64 php-xml-5.4.16-23.el7_0.1.x86_64 php-cli-5.4.16-23.el7_0.1.x86_64 php-5.4.16-23.el7_0.1.x86_64 php-xmlrpc-5.4.16-23.el7_0.1.x86_64 php-pdo-5.4.16-23.el7_0.1.x86_64 php-soap-5.4.16-23.el7_0.1.x86_64 php-mbstring-5.4.16-23.el7_0.1.x86_64 php-ldap-5.4.16-23.el7_0.1.x86_64 php-gd-5.4.16-23.el7_0.1.x86_64 php-devel-5.4.16-23.el7_0.1.x86_64 |
■PHPの設定
PHPの設定ファイル ( /etc/php.ini ) を下記のように編集します。各パラメータの値はサンプルであり、各々の環境に合わせて変更してください。
# vi /etc/php.ini ;405行目 memory_limit = 2000M ;672行目 post_max_size = 2000M ;692行目 default_charset = "UTF-8" ;800行目 upload_max_filesize = 2000M ;878行目 date.timezone = 'Asia/Tokyo' ;1660行目 mbstring.language = Japanese ;1666行目 mbstring.internal_encoding = UTF-8 ;1670行目 ;mbstring.http_input = auto mbstring.http_input = pass ;1676行目 ;mbstring.http_output = SJIS mbstring.http_output = pass |
■MariaDBの初期設定
設定ファイルは/etc/my.cnfになり、/etc/my.cnf.d以下の設定ファイルがインクルードされる形となっています。この中で/etc/my.cnfを編集し文字コードを設定しておきます。
# vi /etc/my.cnf [mysqld] datadir=/var/lib/mysql socket=/var/lib/mysql/mysql.sock # Disabling symbolic-links is recommended to prevent assorted security risks symbolic-links=0 # Settings user and group are ignored when systemd is used. # If you need to run mysqld under a different user or group, # customize your systemd unit file for mariadb according to the # instructions in http://fedoraproject.org/wiki/Systemd character-set-server=utf8 |
systemctlコマンドでmariadbを有効にしてから起動します。 ( 有効にしてからでないと起動しませんでした )
# systemctl enable mariadb.service # systemctl start mariadb.service |
初期セットアップコマンドがあり対話形式に進めていきますので、それを実行します。rootパスワードを設定するところのみ入力する必要がありますが、その他についてはそのままEnterで大丈夫です。
# mysql_secure_installation
/usr/bin/mysql_secure_installation: 行 379: find_mysql_client: コマンドが見つかりません

NOTE: RUNNING ALL PARTS OF THIS SCRIPT IS RECOMMENDED FOR ALL MariaDB
      SERVERS IN PRODUCTION USE!  PLEASE READ EACH STEP CAREFULLY!

In order to log into MariaDB to secure it, we'll need the current
password for the root user.  If you've just installed MariaDB, and
you haven't set the root password yet, the password will be blank,
so you should just press enter here.

Enter current password for root (enter for none):[enter]
OK, successfully used password, moving on...

Setting the root password ensures that nobody can log into the MariaDB
root user without the proper authorisation.

Set root password? [Y/n][enter]
New password:[パスワード入力]
Re-enter new password:[パスワード入力]
Password updated successfully!
Reloading privilege tables..
 ... Success!


By default, a MariaDB installation has an anonymous user, allowing anyone
to log into MariaDB without having to have a user account created for
them.  This is intended only for testing, and to make the installation
go a bit smoother.  You should remove them before moving into a
production environment.

Remove anonymous users? [Y/n][enter]
 ... Success!

Normally, root should only be allowed to connect from 'localhost'.  This
ensures that someone cannot guess at the root password from the network.

Disallow root login remotely? [Y/n][enter]
 ... Success!

By default, MariaDB comes with a database named 'test' that anyone can
access.  This is also intended only for testing, and should be removed
before moving into a production environment.

Remove test database and access to it? [Y/n][enter]
 - Dropping test database...
 ... Success!
 - Removing privileges on test database...
 ... Success!

Reloading the privilege tables will ensure that all changes made so far
will take effect immediately.

Reload privilege tables now? [Y/n][enter]
 ... Success!

Cleaning up...

All done!  If you've completed all of the above steps, your MariaDB
installation should now be secure.

Thanks for using MariaDB!
|
初期設定が完了したらMoodle用のデータベースを作成します。
# mysql -u root -p Enter password:[rootパスワード入力] Welcome to the MariaDB monitor. Commands end with ; or \g. Your MariaDB connection id is 10 Server version: 5.5.37-MariaDB MariaDB Server Copyright (c) 2000, 2014, Oracle, Monty Program Ab and others. Type 'help;' or '\h' for help. Type '\c' to clear the current input statement. MariaDB [(none)]> create database moodle default character set utf8; Query OK, 1 row affected (0.00 sec) MariaDB [(none)]> grant all on moodle.* to moodle@localhost identified by '******'; Query OK, 0 rows affected (0.00 sec) MariaDB [(none)]> flush privileges; Query OK, 0 rows affected (0.00 sec) MariaDB [(none)]> quit; Bye |
■Moodleのインストール
Moodle本体を以下のサイトからダウンロードしてきます。2014/10時点で最新バージョンは2.7.2となっています。
tgzファイルをダウンロードし、展開してゆきます。
# mv moodle-latest-27.tgz /var/www/html/ # cd /var/www/html/ # tar xvzf moodle-latest-27.tgz # rm -rf moodle-latest-27.tgz |
次にMoodleが保存するデータ領域のディレクトリを作成しておきます。
# mkdir /var/www/moodledata |
そして属性を整えておきます。
# chmod -R 755 /var/www/ # chown -R apache.apache /var/www/ |
データベースへの接続パラメータなど、あらかじめ設定をconfig.phpファイルに設定しておきます。
# pwd
/var/www/html/moodle
# mv config-dist.php config.php
# vi config.php

<省略>
//=========================================================================
// 1. DATABASE SETUP
//=========================================================================
// First, you need to configure the database where all Moodle data       //
// will be stored.  This database must already have been created         //
// and a username/password created to access it.                         //

$CFG->dbtype    = 'mariadb';      // 'pgsql', 'mariadb', 'mysqli', 'mssql', 'sqlsrv' or 'oci
'
$CFG->dblibrary = 'native';     // 'native' only at the moment
$CFG->dbhost    = 'localhost';  // eg 'localhost' or 'db.isp.com' or IP
$CFG->dbname    = 'moodle';     // database name, eg moodle
$CFG->dbuser    = 'moodle';   // your database username
$CFG->dbpass    = '*******';   // your database password
$CFG->prefix    = 'mdl_';       // prefix to use for all table names
$CFG->dboptions = array(
    'dbpersist' => false,       // should persistent database connections be
                                //  used? set to 'false' for the most stable
                                //  setting, 'true' can improve performance
                                //  sometimes
    'dbsocket'  => false,       // should connection via UNIX socket be used?
                                //  if you set it to 'true' or custom path
                                //  here set dbhost to 'localhost',
                                //  (please note mysql is always using socket
                                //  if dbhost is 'localhost' - if you need
                                //  local port connection use '127.0.0.1')
    'dbport'    => '',          // the TCP port number to use when connecting
                                //  to the server. keep empty string for the
                                //  default port
);

//=========================================================================
// 2. WEB SITE LOCATION
//=========================================================================
// Now you need to tell Moodle where it is located. Specify the full
// web address to where moodle has been installed.  If your web site
// is accessible via multiple URLs then choose the most natural one
// that your students would use.  Do not include a trailing slash
//
// If you need both intranet and Internet access please read
// http://docs.moodle.org/en/masquerading

$CFG->wwwroot   = 'http://moodle.unix-power.net/';


//=========================================================================
// 3. DATA FILES LOCATION
//=========================================================================
// Now you need a place where Moodle can save uploaded files.  This
// directory should be readable AND WRITEABLE by the web server user
// (usually 'nobody' or 'apache'), but it should not be accessible
// directly via the web.
//
// - On hosting systems you might need to make sure that your "group" has
//   no permissions at all, but that "others" have full permissions.
//
// - On Windows systems you might specify something like 'c:\moodledata'

$CFG->dataroot  = '/var/www/moodledata';

<省略>
|
後はWeb上から設定することになりますので、Apacheを起動する必要があります。細かい設定はおいておいて以下のコマンドを実行後、moodleにアクセスできます。
# systemctl enable httpd.service # systemctl start httpd.service |
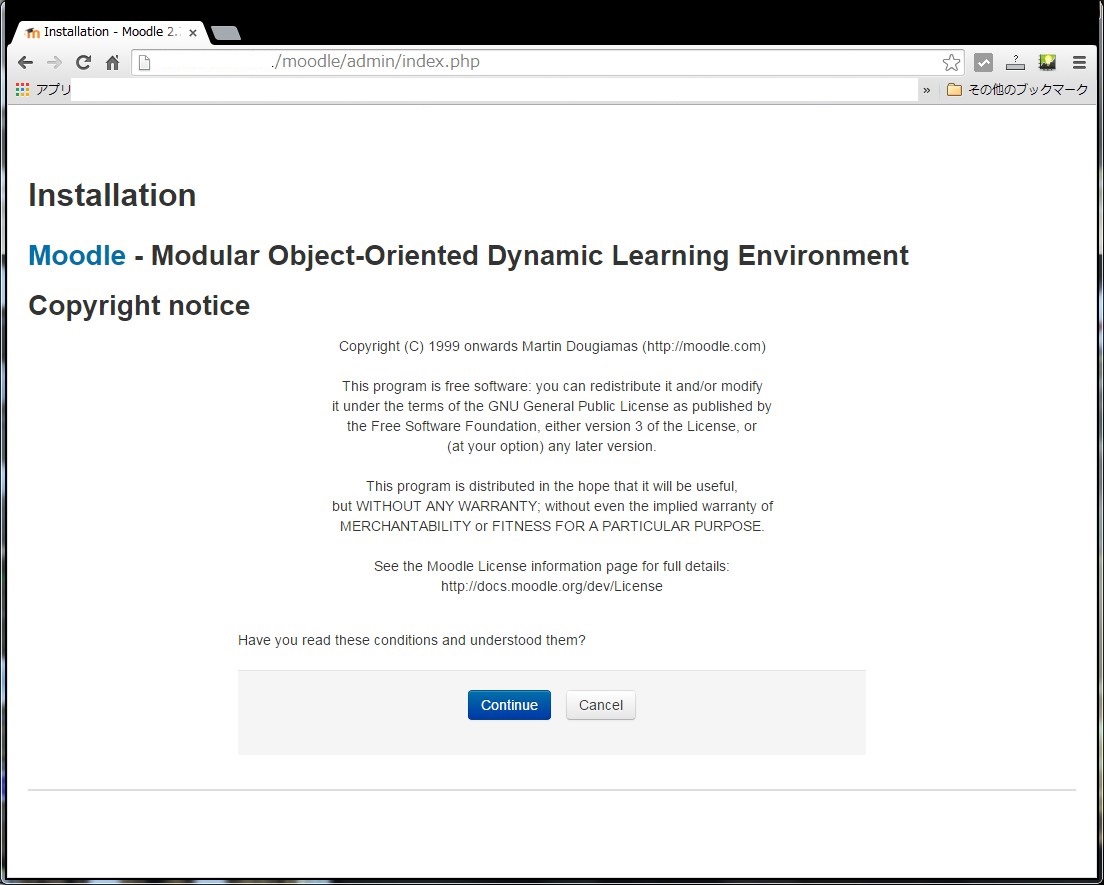
アクセス先はhttp://hostname/moodle/admin/index.phpとなります。アクセスすると以下のような画面が表示されますのでContinueボタンをクリックします。
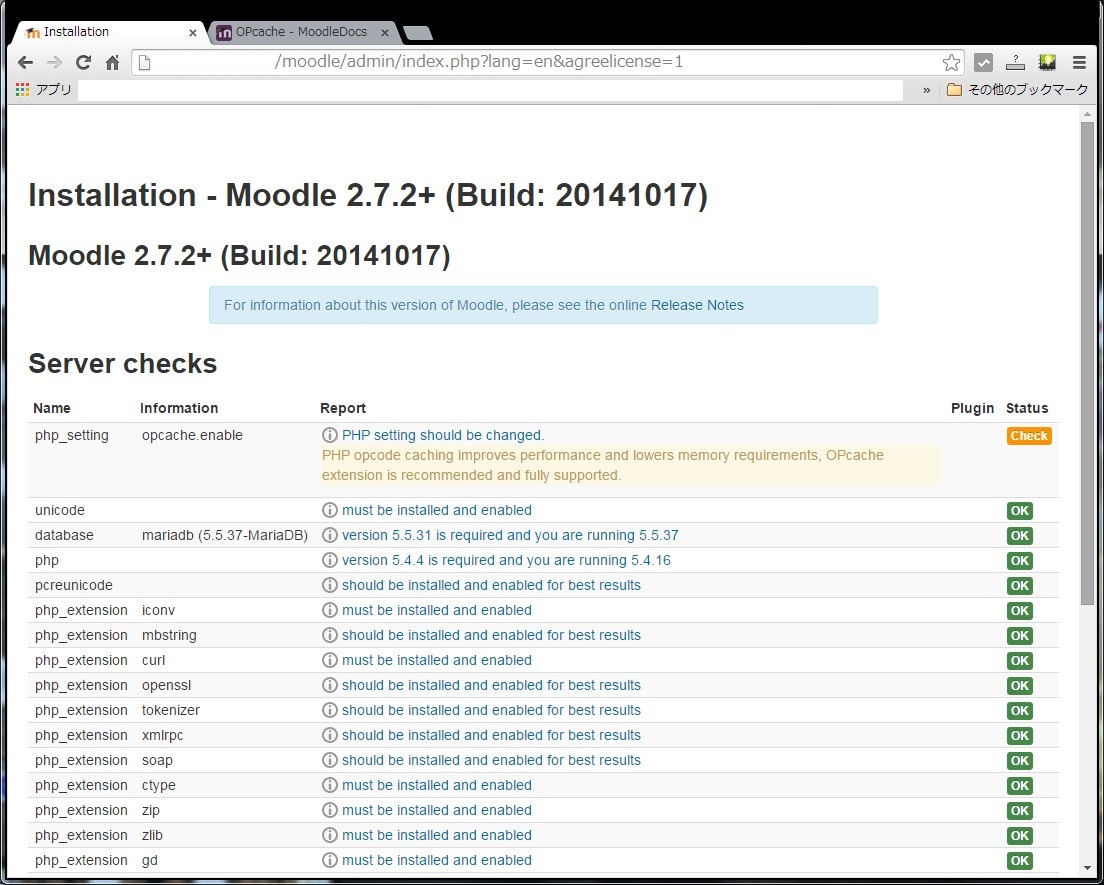
次に主にPHPに関するチェックが走り、その結果が表示されます。以下ではopcacheが有効になっていないとメッセージが表示されているのですが、opcacheはPHP5.5からの機能なので気にせずそのまま進めます。
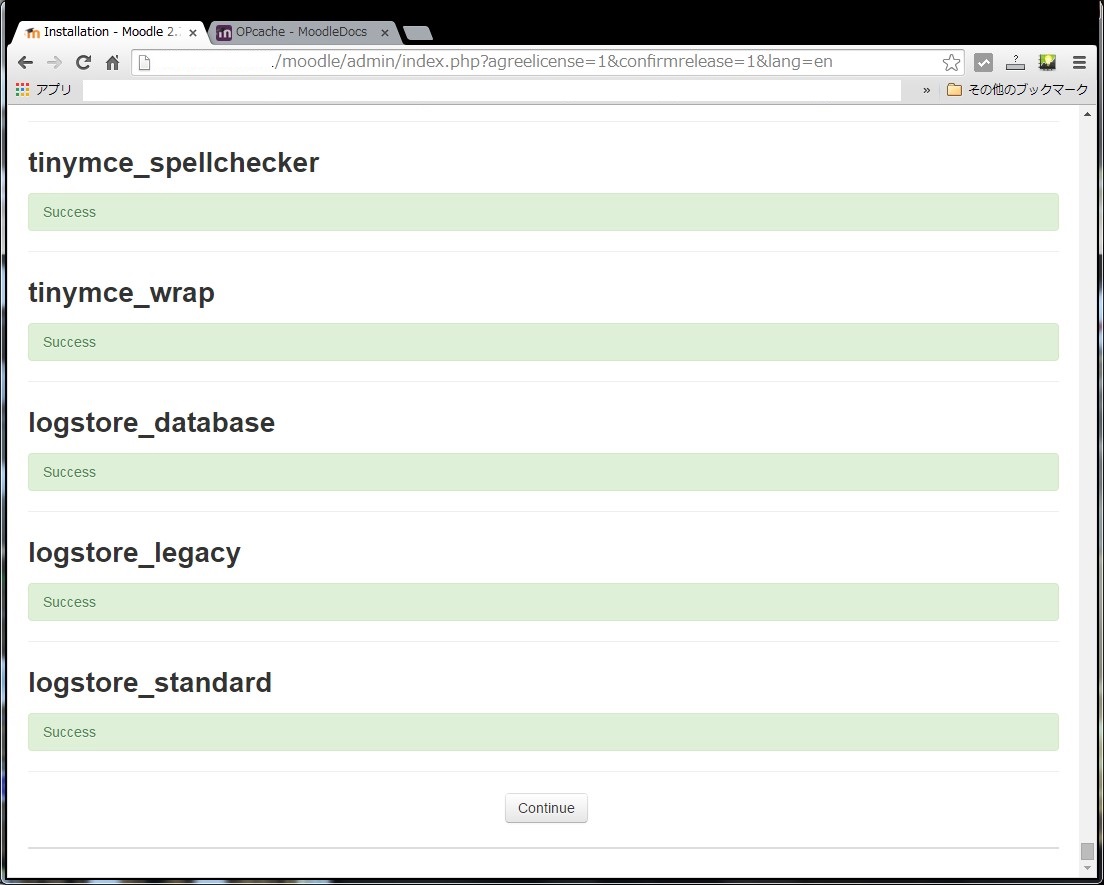
次のページで全てSuccessになっていることを確認してContinueをクリックします。
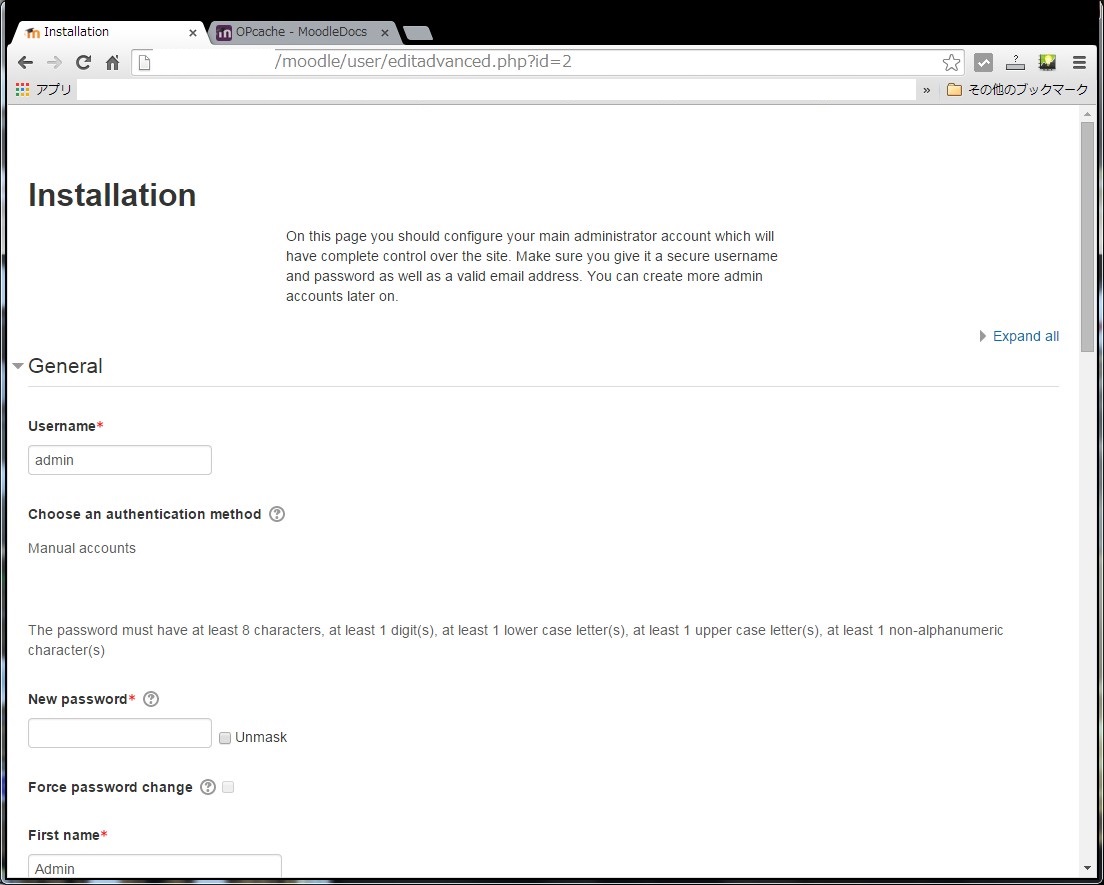
次のページで管理者のパスワードやメールアドレスなどの設定を行います。パスワードは簡単なものではなくある程度複雑なものが要求されます。
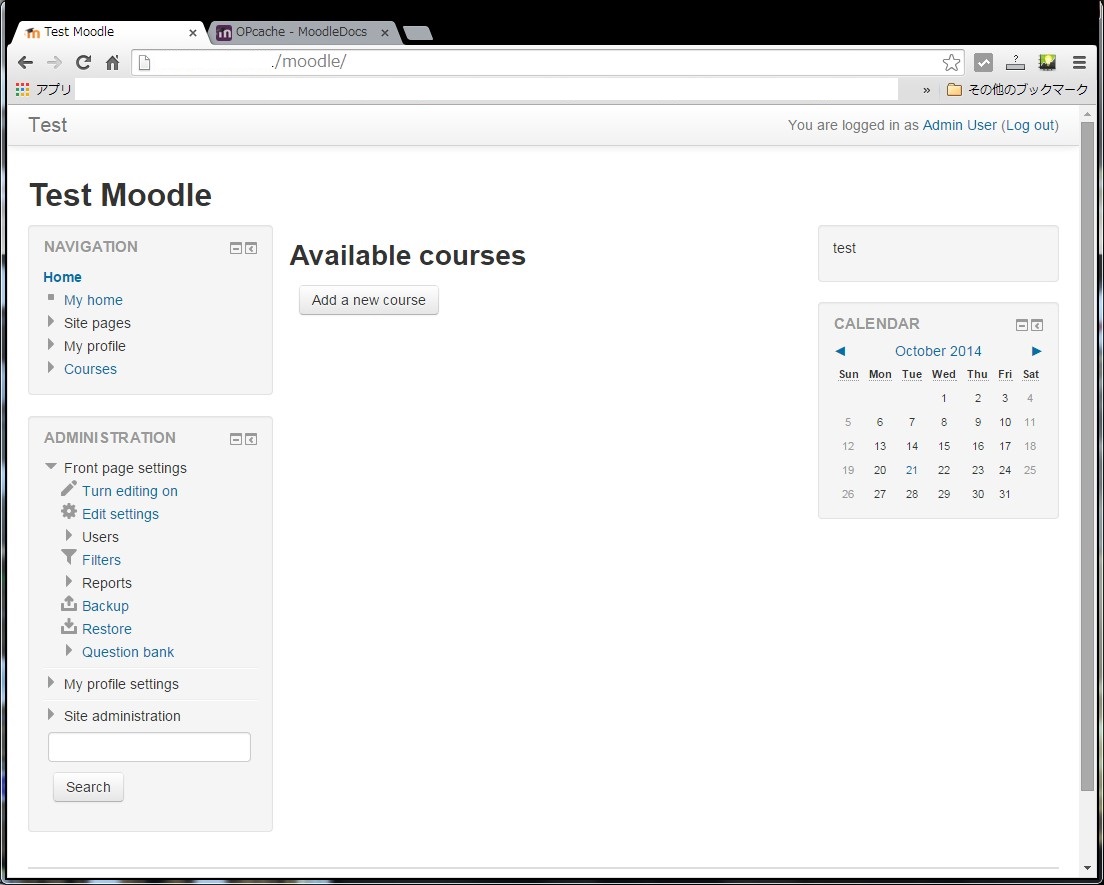
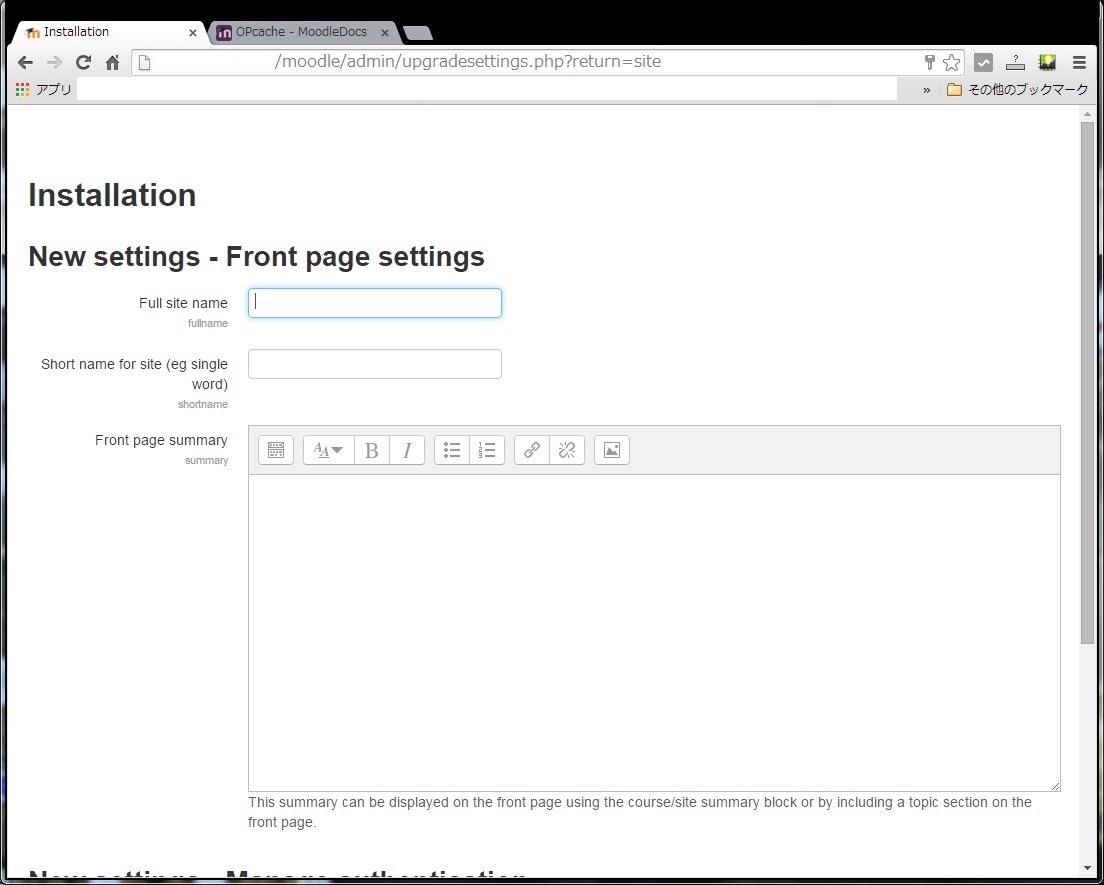
Moodleのトップページに表示する文字列などを設定します。ここでは適当にTestと入力してみました。
入力し、次のページにいくとMoodleのトップ画面となります。初期インストールはこれで完了となります。