■プロジェクト管理ツール Remineのインストール
CentOS7にRedmineをインストールする手順のメモ書きを残します。Redmineとはプロジェクト管理ツールであり、使い方はその人次第という部分が大きく、私の場合はとりあえず仕事の障害管理台帳およびQ&Aのナレッジを蓄積したいという目的で使ってみようと思い立ちました。
必要なソフトはなるべくyumを使ってインストールしていきます。まず開発環境はインストールされているという前提でデータベース ( MariaDB ) をインストールします。
# yum install mariadb mariadb-devel mariadb-server # rpm -qa | grep mariadb mariadb-5.5.37-1.el7_0.x86_64 mariadb-server-5.5.37-1.el7_0.x86_64 mariadb-devel-5.5.37-1.el7_0.x86_64 mariadb-libs-5.5.37-1.el7_0.x86_64 |
設定ファイルは/etc/my.cnfになり、/etc/my.cnf.d以下の設定ファイルがインクルードされる形となっています。この中で/etc/my.cnfを編集し文字コードを設定しておきます。
# vi /etc/my.cnf [mysqld] datadir=/var/lib/mysql socket=/var/lib/mysql/mysql.sock # Disabling symbolic-links is recommended to prevent assorted security risks symbolic-links=0 # Settings user and group are ignored when systemd is used. # If you need to run mysqld under a different user or group, # customize your systemd unit file for mariadb according to the # instructions in http://fedoraproject.org/wiki/Systemd character-set-server=utf8 |
systemctlコマンドでmariadbを有効にしてから起動します。 ( 有効にしてからでないと起動しませんでした )
# systemctl enable mariadb.service # systemctl start mariadb.service |
続いてMariaDBの初期設定を行います。初期セットアップコマンドがあり対話形式に進めていきますので、それを実行します。rootパスワードを設定するところのみ入力する必要がありますが、その他についてはそのままEnterで大丈夫です。
# mysql_secure_installation
/usr/bin/mysql_secure_installation: 行 379: find_mysql_client: コマンドが見つかりません

NOTE: RUNNING ALL PARTS OF THIS SCRIPT IS RECOMMENDED FOR ALL MariaDB
      SERVERS IN PRODUCTION USE!  PLEASE READ EACH STEP CAREFULLY!

In order to log into MariaDB to secure it, we'll need the current
password for the root user.  If you've just installed MariaDB, and
you haven't set the root password yet, the password will be blank,
so you should just press enter here.

Enter current password for root (enter for none):[enter]
OK, successfully used password, moving on...

Setting the root password ensures that nobody can log into the MariaDB
root user without the proper authorisation.

Set root password? [Y/n][enter]
New password:[パスワード入力]
Re-enter new password:[パスワード入力]
Password updated successfully!
Reloading privilege tables..
 ... Success!


By default, a MariaDB installation has an anonymous user, allowing anyone
to log into MariaDB without having to have a user account created for
them.  This is intended only for testing, and to make the installation
go a bit smoother.  You should remove them before moving into a
production environment.

Remove anonymous users? [Y/n][enter]
 ... Success!

Normally, root should only be allowed to connect from 'localhost'.  This
ensures that someone cannot guess at the root password from the network.

Disallow root login remotely? [Y/n][enter]
 ... Success!

By default, MariaDB comes with a database named 'test' that anyone can
access.  This is also intended only for testing, and should be removed
before moving into a production environment.

Remove test database and access to it? [Y/n][enter]
 - Dropping test database...
 ... Success!
 - Removing privileges on test database...
 ... Success!

Reloading the privilege tables will ensure that all changes made so far
will take effect immediately.

Reload privilege tables now? [Y/n][enter]
 ... Success!

Cleaning up...

All done!  If you've completed all of the above steps, your MariaDB
installation should now be secure.

Thanks for using MariaDB!
|
引き続きRedmine用のデータベースとユーザを作成します。
# mysql -u root -p Enter password:[rootパスワードを入力] Welcome to the MariaDB monitor. Commands end with ; or \g. Your MariaDB connection id is 4679 Server version: 5.5.37-MariaDB MariaDB Server Copyright (c) 2000, 2014, Oracle, Monty Program Ab and others. Type 'help;' or '\h' for help. Type '\c' to clear the current input statement. MariaDB [(none)]> create database redmine default character set utf8; Query OK, 1 row affected (0.00 sec) MariaDB [(none)]> grant all on redmine.* to redmine@localhost identified by '****'; Query OK, 0 rows affected (0.00 sec) MariaDB [(none)]> flush privileges; Query OK, 0 rows affected (0.00 sec) MariaDB [(none)]> exit; Bye |
次にImageMagickとヘッダファイル、日本語フォントのインストールを行います。依存関係のパッケージも多数インストールされます。
# yum install ImageMagick ImageMagick-devel ipa-pgothic-fonts |
次にApacheをインストールします。こちらも依存関係のパッケージが多数インストールされます。
# yum install httpd httpd-devel |
RedmineはRubyで書かれた言語なのでRuby本体もインストールします。CentOS7の場合はRubyのライブラリ管理ツールのgemも合わせてインストールされました。これはperlでいうcpanみたいなものであってruby用ライブラリはこのgemコマンドを使ってインストールすることができます。
# yum install ruby ruby-devel # rpm -qa | grep ruby rubygem-rdoc-4.0.0-20.el7.noarch rubygem-bigdecimal-1.2.0-20.el7.x86_64 rubygems-2.0.14-20.el7.noarch ruby-libs-2.0.0.353-20.el7.x86_64 rubygem-psych-2.0.0-20.el7.x86_64 ruby-2.0.0.353-20.el7.x86_64 ruby-irb-2.0.0.353-20.el7.noarch rubygem-json-1.7.7-20.el7.x86_64 ruby-devel-2.0.0.353-20.el7.x86_64 rubygem-io-console-0.4.2-20.el7.x86_64 |
rpmパッケージ名でバージョンはわかりますが、下記のコマンドでもrubyのバージョンを確認できます。
# ruby -v ruby 2.0.0p353 (2013-11-22) [x86_64-linux] |
Redmineが使用するGemを一括インストールするためのツール、bundlerをインストールします。
# gem install bundler Fetching: bundler-1.7.3.gem (100%) Successfully installed bundler-1.7.3 Parsing documentation for bundler-1.7.3 Installing ri documentation for bundler-1.7.3 1 gem installed |
下記のページからRedmineをダウンロードし、インストールします。
http://www.redmine.org/projects/redmine/wiki/Download
2014/10現在、最新バージョンは2.5.2なのでこれをインストールします。tar.gzを展開したフォルダを任意の位置に配置するのですがMariadb ( mysql ) が/var/libに配置されていますので、/var/lib/redmineにしてみました。
# tar xvzf redmine-2.5.2.tar.gz # mv redmine-2.5.2 /var/lib/redmine |
データベースの接続設定ファイルを作成します。/var/lib/redmine配下にdatabase.ymlというファイルを以下のように作成します。なお、database.yml.exampleというファイルが既に存在していますのでこれを編集してもOKです。
# cd /var/lib/redmine/config # vi database.yml production: adapter: mysql2 database: redmine host: localhost username: redmine password: "*******" encoding: utf8 |
次にメールサーバの接続設定を行います。/var/lib/redmine配下にconfiguration.ymlというファイルを以下のように作成します。なお、configuration.yml.exampleというファイルが既に存在していますのでこれを編集してもOKです。
# vi database.yml

production:
  email_delivery:
    delivery_method: :smtp
    smtp_settings:
      address: "localhost"
      port: 25
      domain: 'unix-power.net'

rmagick_font_path: /usr/share/fonts/ipa-pgothic/ipagp.ttf
|
Redmineが使用するGEMをbundleコマンドを使ってインストールします。
# cd /var/lib/redmine # bundle install --without development test <省略> Your bundle is complete! Gems in the groups development and test were not installed. Use `bundle show [gemname]` to see where a bundled gem is installed. Post-install message from rmagick: Please report any bugs. See https://github.com/gemhome/rmagick/compare/RMagick_2-13-2...\ master and https://github.com/rmagick/rmagick/issues/18 |
続いてsecret_tokenの作成とDBマイグレーションを行います。/var/lib/redmineで以下のコマンドを実行します。
# bundle exec rake generate_secret_token # RAILS_ENV=production bundle exec rake db:migrate <出力は省略> |
Redmine本体のインストールは完了しましたが、Apacheと連携する必要がありますので、それに必要なPassengerをgemからインストールします。
# gem install passenger --no-rdoc --no-ri Fetching: daemon_controller-1.2.0.gem (100%) Successfully installed daemon_controller-1.2.0 Fetching: passenger-4.0.53.gem (100%) Building native extensions. This could take a while... Successfully installed passenger-4.0.53 2 gems installed |
続いてPassengerのApache用モジュールをインストールします。これは対話形式で進めていきます。事前に必要なパッケージが入っているかチェックが走りますが私の場合、libcurl-develが入っておらずエラーとなりましたので事前にこれをインストールしました。
# yum install libcurl-devel
# passenger-install-apache2-module
Welcome to the Phusion Passenger Apache 2 module installer, v4.0.53.

This installer will guide you through the entire installation process. It
shouldn't take more than 3 minutes in total.

Here's what you can expect from the installation process:

 1. The Apache 2 module will be installed for you.
 2. You'll learn how to configure Apache.
 3. You'll learn how to deploy a Ruby on Rails application.

Don't worry if anything goes wrong. This installer will advise you on how to
solve any problems.

Press Enter to continue, or Ctrl-C to abort.


--------------------------------------------

Which languages are you interested in?

Use <space> to select.
If the menu doesn't display correctly, press '!'

 ? ?  Ruby
   ?  Python
   ?  Node.js
   ?  Meteor

--------------------------------------------

Checking for required software...

 * Checking for C compiler...
      Found: yes
      Location: /usr/bin/cc
 * Checking for C++ compiler...
      Found: yes
      Location: /usr/bin/c++
 * Checking for Curl development headers with SSL support...
      Found: yes
      curl-config location: /usr/bin/curl-config
      Header location: somewhere, not sure where
      Version: libcurl 7.29.0
      Usable: yes
      Supports SSL: yes
 * Checking for OpenSSL development headers...
      Found: yes
      Location: true
 * Checking for Zlib development headers...
      Found: yes
      Location: true
 * Checking for Apache 2...
      Found: yes
      Location of httpd: /usr/sbin/httpd
      Apache version: 2.4.6
 * Checking for Apache 2 development headers...
      Found: yes
      Location of apxs2: /usr/bin/apxs
 * Checking for Rake (associated with /usr/bin/ruby)...
      Found: yes
      Location: /usr/bin/ruby /usr/local/bin/rake
 * Checking for OpenSSL support for Ruby...
      Found: yes
 * Checking for RubyGems...
      Found: yes
 * Checking for Ruby development headers...
      Found: yes
      Location: /usr/include/ruby.h
 * Checking for rack...
      Found: yes
 * Checking for Apache Portable Runtime (APR) development headers...
      Found: yes
      Location: /usr/bin/apr-1-config
      Version: 1.4.8
 * Checking for Apache Portable Runtime Utility (APU) development headers...
      Found: yes
      Location: /usr/bin/apu-1-config
      Version: 1.5.2

--------------------------------------------

Sanity checking Apache installation...
All good!


<省略>


--------------------------------------------
Almost there!

Please edit your Apache configuration file, and add these lines:

   LoadModule passenger_module /usr/local/share/gems/gems/passenger-4.0.53/buildout/apache2/mod_passenger.so
   <IfModule mod_passenger.c>
     PassengerRoot /usr/local/share/gems/gems/passenger-4.0.53
     PassengerDefaultRuby /usr/bin/ruby
   </IfModule>

After you restart Apache, you are ready to deploy any number of web
applications on Apache, with a minimum amount of configuration!

Press ENTER to continue.

--------------------------------------------

Deploying a web application: an example

Suppose you have a web application in /somewhere. Add a virtual host to your
Apache configuration file and set its DocumentRoot to /somewhere/public:

   <VirtualHost *:80>
      ServerName www.yourhost.com
      # !!! Be sure to point DocumentRoot to 'public'!
      DocumentRoot /somewhere/public
      <Directory /somewhere/public>
         # This relaxes Apache security settings.
         AllowOverride all
         # MultiViews must be turned off.
         Options -MultiViews
         # Uncomment this if you're on Apache >= 2.4:
         #Require all granted
      </Directory>
   </VirtualHost>

And that's it! You may also want to check the Users Guide for security and
optimization tips, troubleshooting and other useful information:

  /usr/local/share/gems/gems/passenger-4.0.53/doc/Users guide Apache.html
  https://www.phusionpassenger.com/documentation/Users%20guide%20Apache.html

Enjoy Phusion Passenger, a product of Phusion (www.phusion.nl) :-)
https://www.phusionpassenger.com

Phusion Passenger is a trademark of Hongli Lai & Ninh Bui.
|
上記の太文字の部分はApacheに追加が必要な設定となりますので控えておく必要があります。また、以下のコマンドでも再表示することができます。
# passenger-install-apache2-module --snippet LoadModule passenger_module /usr/local/share/gems/gems/passenger-4.0.53/buildout/apache2/mod_passenger.so <IfModule mod_passenger.c> PassengerRoot /usr/local/share/gems/gems/passenger-4.0.53 PassengerDefaultRuby /usr/bin/ruby </IfModule> |
上の出力に従ってapacheの設定を変更します。httpd.confに直接追加でもよいですが、わかりやすくするためPassenger用のconfファイルを新たに作成し、そこに設定を追記します。
# vi /etc/httpd/conf.d/passenger.conf LoadModule passenger_module /usr/local/share/gems/gems/passenger-4.0.53/buildout/apache2/mod_passenger.so <IfModule mod_passenger.c> PassengerRoot /usr/local/share/gems/gems/passenger-4.0.53 PassengerDefaultRuby /usr/bin/ruby </IfModule> # Passengerが追加するHTTPヘッダを削除するための設定(任意)。 # Header always unset "X-Powered-By" Header always unset "X-Rack-Cache" Header always unset "X-Content-Digest" Header always unset "X-Runtime" # 必要に応じてPassengerのチューニングのための設定を追加(任意)。 # 詳しくはPhusion Passenger users guide(http://www.modrails.com/documentation/Users%20guide%20Apache.html)をご覧ください。 PassengerMaxPoolSize 20 PassengerMaxInstancesPerApp 4 PassengerPoolIdleTime 3600 PassengerHighPerformance on PassengerStatThrottleRate 10 PassengerSpawnMethod smart RailsAppSpawnerIdleTime 86400 PassengerMaxPreloaderIdleTime 0 |
あとはhttpd.confのDocumentRootを今回インストールした/var/lib/redmine/publicに設定して次の設定を追加します。
# vi /etc/httpd/conf/httpd.conf <省略> DocumentRoot "/var/lib/redmine/public" <省略> RailsBaseURI /redmine |
設定を有効にするためにapacheを再起動します。
# systemctl restart httpd.service |
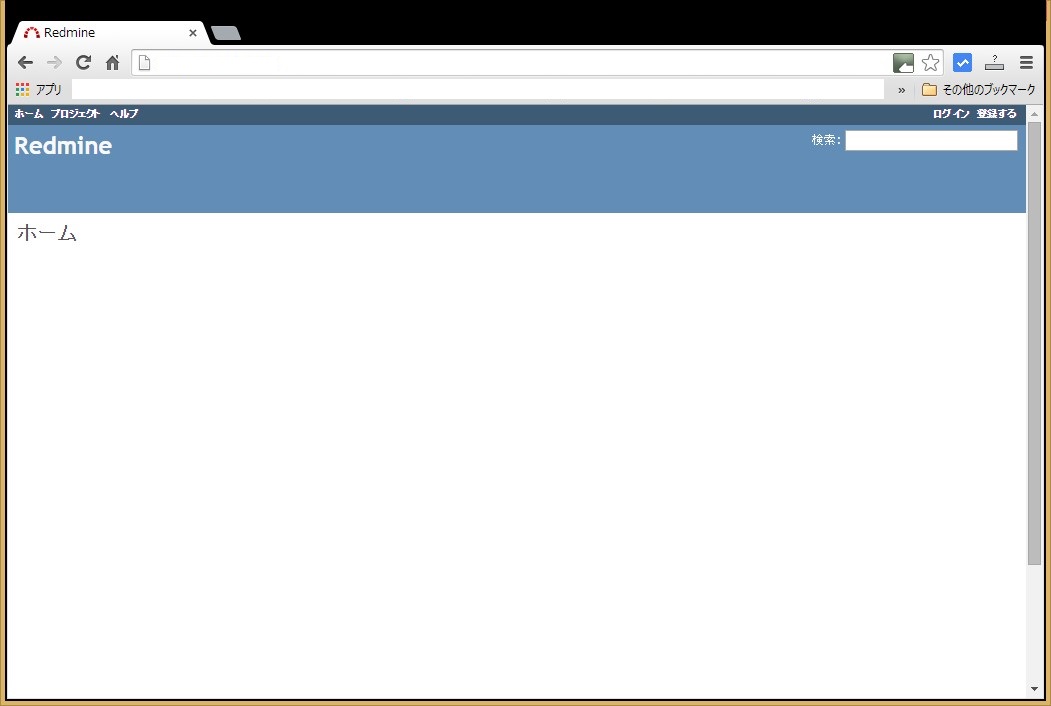
ドキュメントルート配下は一見、何もHTMLファイルはないように見えますが、上記で組み込んだPassengerモジュールで自動的にRailsアプリケーションを認識し以下のような画面が表示されるようになります。
参考URL:http://blog.redmine.jp/articles/2_5/installation_centos/