SNMP経由でサーバやネットワーク機器のCPU負荷やトラフィック流量などを計測するツールでcactiというツールがあります。オープンソースのソフトウェアで日本語化もされていないのですが、世界中で多数の実績があり使い勝手も非常によく見た目も美しく大変お勧めのツールです。似たようなツールでMRTGというのが昔からありますが、MRTGよりもcactiのほうが絶対にお勧めです。
オープンソースであるということから世界中の誰でも開発に参加できるという観点からcactiで取得できる様々なネットワーク機器ベンダー ( Cisco / Juniper など ) のtemplateが公開されており、有名どころの機器であれば大抵対応しておりリソースを計測することができます。当然ながら機器がSNMPに対応している必要があります。
■MySQLのインストールと設定
cactiはyumからインストールを行います。cactiのデータの保存はデータベースサーバ ( MySQL ) に保存しますので合わせてインストールします。デフォルトのMariaDBのバージョンは5.5.56 ( 2018/1/4現在 ) で、これだとcacti1.1.xに怒られるので先ず最初にこれをアンインストール後、MySQL5.7をインストールします。
# yum remove mariadb-libs # yum -y localinstall http://dev.mysql.com/get/mysql57-community-release-el7-7.noarch.rpm # yum install php mysql-community-server # rpm -qa | grep mysql mysql-community-server-5.7.20-1.el7.x86_64 mysql-community-common-5.7.20-1.el7.x86_64 mysql57-community-release-el7-7.noarch mysql-community-libs-5.7.20-1.el7.x86_64 mysql-community-client-5.7.20-1.el7.x86_64 |
これでインストールは完了なのでとりあえず起動まで確認します。
# systemctl enable mysqld
# systemctl start mysqld
# systemctl status mysqld

● mysqld.service - MySQL Server
   Loaded: loaded (/usr/lib/systemd/system/mysqld.service; enabled; vendor preset: disabled)
   Active: active (running) since 木 2018-01-04 16:35:22 JST; 4min 40s ago
     Docs: man:mysqld(8)
           http://dev.mysql.com/doc/refman/en/using-systemd.html
  <省略>
|
この状態まできたら初期パスワードが自動生成されています。それが/var/log/mysqld.logに出力されているので以下のコマンドで確認します。末尾にある12桁の英数字が初期パスワードとなります。
# cat /var/log/mysqld.log | grep password 2018-01-04T07:35:12.878672Z 1 [Note] A temporary password is generated for root@localhost: XXXXXXXXXXXX |
この初期パスワードを使ってmysqlの初期設定を行っていきます。
# mysql_secure_installation Securing the MySQL server deployment. Enter password for user root:【上記の初期パスワードを入力】 The existing password for the user account root has expired. Please set a new password. New password:【新しいパスワード】 Re-enter new password:【パスワードの再入力】※ポリシーにマッチしないと弾かれる The 'validate_password' plugin is installed on the server. The subsequent steps will run with the existing configuration of the plugin. Using existing password for root. Estimated strength of the password: 100 Change the password for root ? ((Press y|Y for Yes, any other key for No) : n ... skipping. By default, a MySQL installation has an anonymous user, allowing anyone to log into MySQL without having to have a user account created for them. This is intended only for testing, and to make the installation go a bit smoother. You should remove them before moving into a production environment. Remove anonymous users? (Press y|Y for Yes, any other key for No) : y Success. Normally, root should only be allowed to connect from 'localhost'. This ensures that someone cannot guess at the root password from the network. Disallow root login remotely? (Press y|Y for Yes, any other key for No) : n ... skipping. By default, MySQL comes with a database named 'test' that anyone can access. This is also intended only for testing, and should be removed before moving into a production environment. Remove test database and access to it? (Press y|Y for Yes, any other key for No) : y - Dropping test database... Success. - Removing privileges on test database... Success. Reloading the privilege tables will ensure that all changes made so far will take effect immediately. Reload privilege tables now? (Press y|Y for Yes, any other key for No) : y Success. All done! |
続けてMySQLのタイムゾーンの設定を以下のコマンドで行います。
# mysql_tzinfo_to_sql /usr/share/zoneinfo | mysql -u root -p mysql Enter password:【パスワード入力】 Warning: Unable to load '/usr/share/zoneinfo/iso3166.tab' as time zone. Skipping it. Warning: Unable to load '/usr/share/zoneinfo/leapseconds' as time zone. Skipping it. Warning: Unable to load '/usr/share/zoneinfo/tzdata.zi' as time zone. Skipping it. Warning: Unable to load '/usr/share/zoneinfo/zone.tab' as time zone. Skipping it. Warning: Unable to load '/usr/share/zoneinfo/zone1970.tab' as time zone. Skipping it. |
さらにMySQLの設定を/etc/my.cnfに追記します。
# For advice on how to change settings please see # http://dev.mysql.com/doc/refman/5.7/en/server-configuration-defaults.html [mysqld] # # Remove leading # and set to the amount of RAM for the most important data # cache in MySQL. Start at 70% of total RAM for dedicated server, else 10%. # innodb_buffer_pool_size = 128M # # Remove leading # to turn on a very important data integrity option: logging # changes to the binary log between backups. # log_bin # # Remove leading # to set options mainly useful for reporting servers. # The server defaults are faster for transactions and fast SELECTs. # Adjust sizes as needed, experiment to find the optimal values. # join_buffer_size = 128M # sort_buffer_size = 2M # read_rnd_buffer_size = 2M datadir=/var/lib/mysql socket=/var/lib/mysql/mysql.sock # Disabling symbolic-links is recommended to prevent assorted security risks symbolic-links=0 log-error=/var/log/mysqld.log pid-file=/var/run/mysqld/mysqld.pid default-time-zone = Asia/Tokyo max_heap_table_size = 256M max_allowed_packet = 16777216 tmp_table_size = 64M join_buffer_size = 64M innodb_buffer_pool_size = 1024M innodb_doublewrite = OFF innodb_flush_log_at_timeout = 3 innodb_read_io_threads = 32 innodb_write_io_threads = 16 character_set_server=utf8mb4 collation_server = utf8mb4_unicode_ci [client] default-character-set=utf8mb4 |
変更後、MySQLを再起動しステータスを確認します。
# systemctl restart mysqld
# systemctl status mysqld

● mysqld.service - MySQL Server
   Loaded: loaded (/usr/lib/systemd/system/mysqld.service; enabled; vendor preset: disabled)
   Active: active (running) since 木 2018-01-04 17:00:18 JST; 9s ago
     Docs: man:mysqld(8)
           http://dev.mysql.com/doc/refman/en/using-systemd.html
  <省略>
|
cactiのデータベースはMySQLに登録しますので、cacti用データベースとユーザを以下のコマンドで作成し、全権限を与えておきます。
# mysql -u root -p Enter password:【パスワード入力】 Welcome to the MySQL monitor. Commands end with ; or \g. Your MySQL connection id is 3 Server version: 5.7.20 MySQL Community Server (GPL) Copyright (c) 2000, 2017, Oracle and/or its affiliates. All rights reserved. Oracle is a registered trademark of Oracle Corporation and/or its affiliates. Other names may be trademarks of their respective owners. Type 'help;' or '\h' for help. Type '\c' to clear the current input statement. mysql> create database cacti; Query OK, 1 row affected (0.00 sec) mysql> GRANT ALL ON cacti.* TO cactiuser@localhost IDENTIFIED BY 'XXXXXX'; Query OK, 0 rows affected, 1 warning (0.00 sec) mysql> GRANT SUPER ON *.* TO cactiuser@localhost; Query OK, 0 rows affected (0.00 sec) mysql> FLUSH privileges; Query OK, 0 rows affected (0.00 sec) mysql> quit Bye |
続けてテーブル参照権限を付与します。
# mysql -u root -p Enter password:【パスワード入力】 Welcome to the MySQL monitor. Commands end with ; or \g. Your MySQL connection id is 3 Server version: 5.7.20 MySQL Community Server (GPL) Copyright (c) 2000, 2017, Oracle and/or its affiliates. All rights reserved. Oracle is a registered trademark of Oracle Corporation and/or its affiliates. Other names may be trademarks of their respective owners. Type 'help;' or '\h' for help. Type '\c' to clear the current input statement. mysql> show variables like '%time_zone%'; +------------------+------------+ | Variable_name | Value | +------------------+------------+ | system_time_zone | JST | | time_zone | Asia/Tokyo | +------------------+------------+ 2 rows in set (0.01 sec) mysql> grant select on mysql.time_zone_name to 'cactiuser'@'localhost' identified by 'XXXX'; Query OK, 0 rows affected, 1 warning (0.00 sec) mysql> quit Bye |
これで下準備は整いました。
![]()
■cactiのインストールと設定
cactiをyumコマンドでインストールします。これは標準リポジトリでは提供されないのでepelリポジトリを追加しておいてください。
# yum install cacti # rpm -qa | grep cacti cacti-1.1.28-1.el7.noarch |
上記で作ったMySQLのcacti用データベースに予め用意されたsqlを流し込みます。
# mysql -u cactiuser -p cacti < /usr/share/doc/cacti-1.1.28/cacti.sql Enter password:【cactiuserのパスワード】 |
cactiの初期設定を行います。上記で作成したcactiuserのパスワードを編集する必要があります。
# vi /etc/cacti/db.php <省略> $database_type = 'mysql'; $database_default = 'cacti'; $database_hostname = 'localhost'; $database_username = 'cactiuser'; $database_password = 'XXXXXXXX'; $database_port = '3306'; $database_ssl = false; <省略> |
さらにcactiのpollerのcronの設定をコメントアウトします。
# vi /etc/cron.d/cacti */5 * * * * cacti /usr/bin/php /usr/share/cacti/poller.php > /dev/null 2>&1 |
上記のpollerを使っても良いのですが、spineを使いたいという場合は以下のようにインストールを行います。
# yum install gcc-c++ autoconf automake dos2unix help2man net-snmp-devel mysql-community-devel # wget https://www.cacti.net/downloads/spine/cacti-spine-1.1.28.tar.gz # ./configure # make # make install |
必要最低限のspineの設定を実施する必要があります。
# cd /usr/local/spine/etc/ # cp spine.conf.dist spine.conf # vi spine.conf <省略> DB_Host localhost DB_Database cacti DB_User cactiuser DB_Pass XXXXXX DB_Port 3306 <省略> |
以上で完了です。
■Apacheの設定
デフォルトではローカルホストからのみcactiにアクセスできるようになっていますので他ホストからもアクセスできるようapacheの設定を変更します。
# vi /etc/httpd/conf.d/cacti.conf

<省略>
<Directory /usr/share/cacti/>
        <IfModule mod_authz_core.c>
                # httpd 2.4
                # Require host localhost
              Require all granted
        </IfModule>
        <IfModule !mod_authz_core.c>
                # httpd 2.2
                Order deny,allow
                Deny from all
                Allow from localhost
        </IfModule>
</Directory>
<省略>
|
この状態でApacheを有効化し起動します。
# systemctl enable httpd.service # systemctl start httpd.service |
■phpの設定
次にPHPの設定ファイルを編集します。最低限、以下の2箇所の設定変更が必要となります。
# vi /etc/php.ini // 692行目 default_charset = "UTF-8" // 878行目 date.timezone = "Asia/Tokyo" |
■Cactiの初期設定
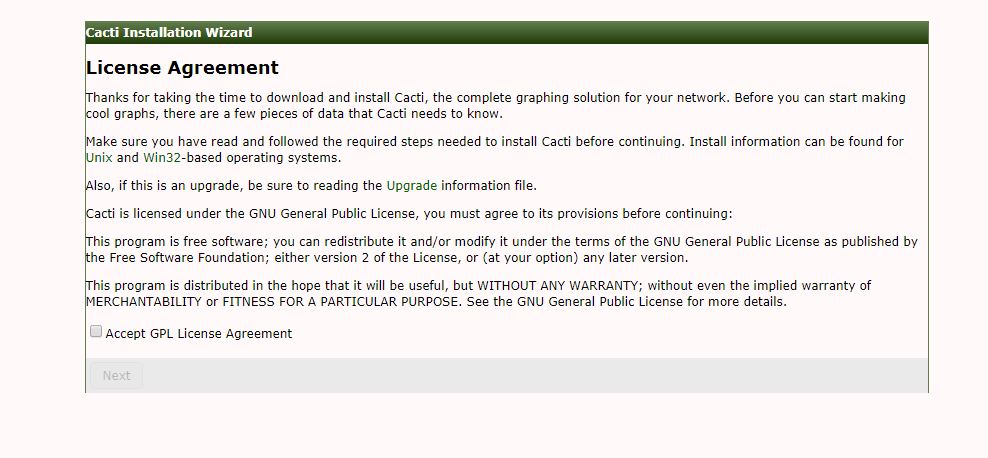
インストールは完了したので以降はブラウザから操作を行います。アクセスURLはhttp://xx.yy.xx.yy/cacti/となります。最初のアクセスでは以下の画面が表示されますのでライセンスに同意してNextボタンをクリックします。
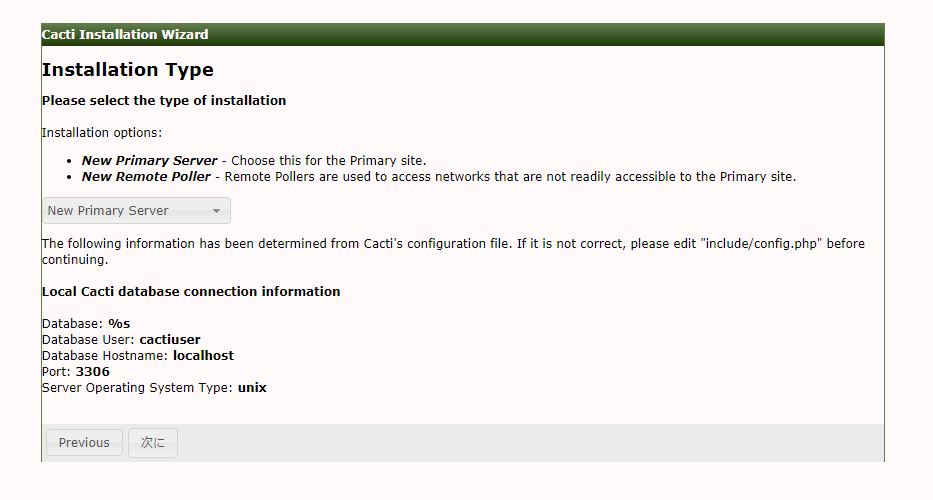
続いてインストールされているソフトウェアのチェックや設定のパラメータのチェックなどが行われます。満たしていないところなどありましたら赤字で表示されますので修正してから再度チェックしてみてください。

下記はそのまま次へをクリックします。
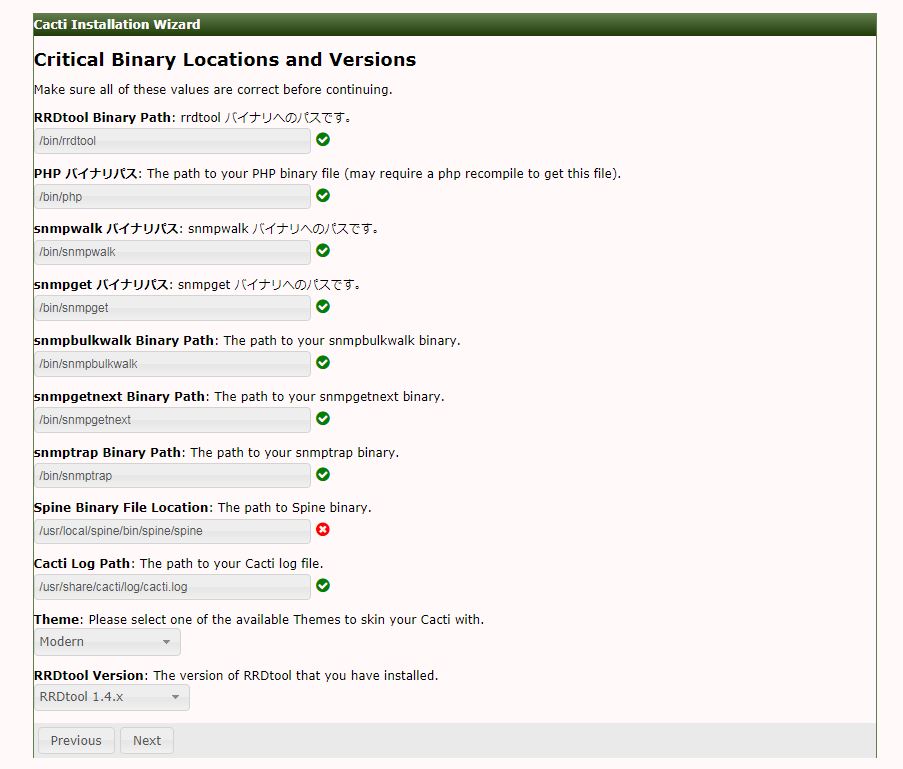
コマンドのパスチェックが行われます。問題なければそのまま次へをクリックします。
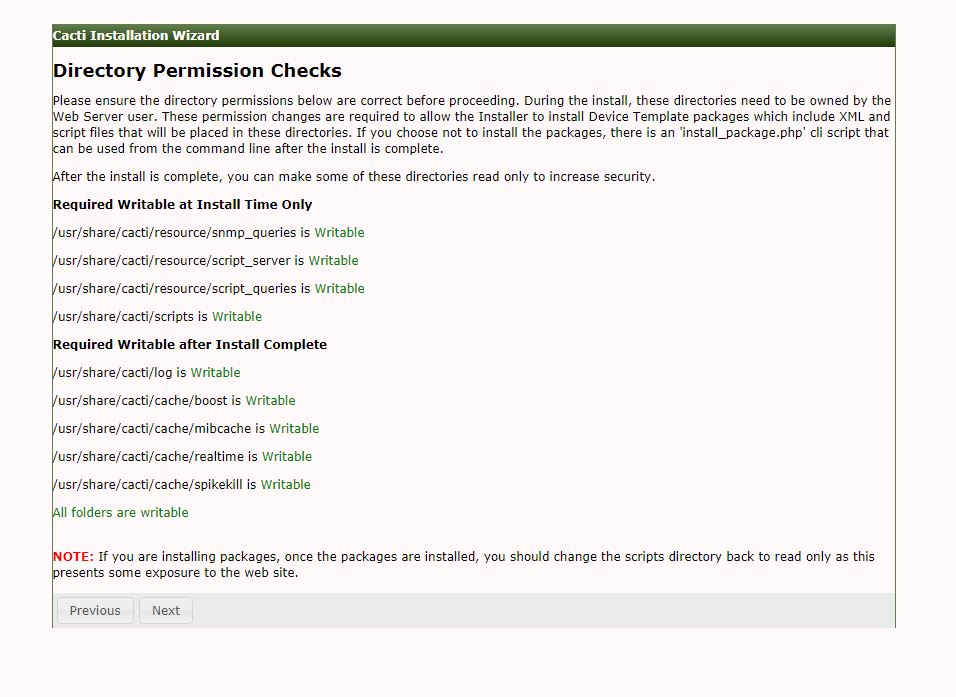
ディレクトリのパーミッションチェックが行われます。こちらも問題なければ次へ進んでください。
テンプレートのセットアップ画面が表示されます。右側のチェックを入れることで標準のテンプレートがインスールされます。

最後にログイン画面が表示されます。
