SNMP経由でサーバやネットワーク機器のCPU負荷やトラフィック流量などを計測するツールでcactiというツールがあります。オープンソースのソフトウェアで日本語化もされていないのですが、世界中で多数の実績があり使い勝手も非常によく見た目も美しく大変お勧めのツールです。似たようなツールでMRTGというのが昔からありますが、MRTGよりもcactiのほうが絶対にお勧めです。
オープンソースであるということから世界中の誰でも開発に参加できるという観点からcactiで取得できる様々なネットワーク機器ベンダー ( Cisco / Juniper など ) のtemplateが公開されており、有名どころの機器であれば大抵対応しておりリソースを計測することができます。当然ながら機器がSNMPに対応している必要があります。
cactiはyumからインストールを行います。cactiのデータの保存はデータベースサーバ ( MariaDB ) に保存しますので合わせてインストールします。
# yum install cacti mariadb-server # rpm -qa | grep cacti cacti-0.8.8b-7.el7.noarch # rpm -qa | grep mariadb mariadb-5.5.37-1.el7_0.x86_64 mariadb-server-5.5.37-1.el7_0.x86_64 mariadb-libs-5.5.37-1.el7_0.x86_64 |
![]()
■MariaDBの設定
cactiの設定に先立ち、MariaDBの初期設定を行います。設定ファイルは/etc/my.cnfになり、/etc/my.cnf.d以下の設定ファイルがインクルードされる形となっています。この中で/etc/my.cnfを編集し文字コードを設定しておきます。
# vi /etc/my.cnf [mysqld] datadir=/var/lib/mysql socket=/var/lib/mysql/mysql.sock # Disabling symbolic-links is recommended to prevent assorted security risks symbolic-links=0 # Settings user and group are ignored when systemd is used. # If you need to run mysqld under a different user or group, # customize your systemd unit file for mariadb according to the # instructions in http://fedoraproject.org/wiki/Systemd character-set-server=utf8 |
systemctlコマンドでmariadbを有効にしてから起動します。 ( 有効にしてからでないと起動しませんでした )
# systemctl enable mariadb.service # systemctl start mariadb.service |
続いてMariaDBの初期設定を行います。初期セットアップコマンドがあり対話形式に進めていきますので、それを実行します。rootパスワードを設定するところのみ入力する必要がありますが、その他についてはそのままEnterで大丈夫です。
# mysql_secure_installation
/usr/bin/mysql_secure_installation: 行 379: find_mysql_client: コマンドが見つかりません

NOTE: RUNNING ALL PARTS OF THIS SCRIPT IS RECOMMENDED FOR ALL MariaDB
      SERVERS IN PRODUCTION USE!  PLEASE READ EACH STEP CAREFULLY!

In order to log into MariaDB to secure it, we'll need the current
password for the root user.  If you've just installed MariaDB, and
you haven't set the root password yet, the password will be blank,
so you should just press enter here.

Enter current password for root (enter for none):[enter]
OK, successfully used password, moving on...

Setting the root password ensures that nobody can log into the MariaDB
root user without the proper authorisation.

Set root password? [Y/n][enter]
New password:[パスワード入力]
Re-enter new password:[パスワード入力]
Password updated successfully!
Reloading privilege tables..
 ... Success!


By default, a MariaDB installation has an anonymous user, allowing anyone
to log into MariaDB without having to have a user account created for
them.  This is intended only for testing, and to make the installation
go a bit smoother.  You should remove them before moving into a
production environment.

Remove anonymous users? [Y/n][enter]
 ... Success!

Normally, root should only be allowed to connect from 'localhost'.  This
ensures that someone cannot guess at the root password from the network.

Disallow root login remotely? [Y/n][enter]
 ... Success!

By default, MariaDB comes with a database named 'test' that anyone can
access.  This is also intended only for testing, and should be removed
before moving into a production environment.

Remove test database and access to it? [Y/n][enter]
 - Dropping test database...
 ... Success!
 - Removing privileges on test database...
 ... Success!

Reloading the privilege tables will ensure that all changes made so far
will take effect immediately.

Reload privilege tables now? [Y/n][enter]
 ... Success!

Cleaning up...

All done!  If you've completed all of the above steps, your MariaDB
installation should now be secure.

Thanks for using MariaDB!
|
続いてcacti用のデータベースを作成します。
# mysql -u root -p Enter password:[rootパスワード入力] Welcome to the MariaDB monitor. Commands end with ; or \g. Your MariaDB connection id is 10 Server version: 5.5.37-MariaDB MariaDB Server Copyright (c) 2000, 2014, Oracle, Monty Program Ab and others. Type 'help;' or '\h' for help. Type '\c' to clear the current input statement. MariaDB [(none)]> create database cacti; Query OK, 1 row affected (0.00 sec) MariaDB [(none)]> grant all privileges on cacti.* to cactiuser@localhost identified by '***'; Query OK, 0 rows affected (0.00 sec) MariaDB [(none)]> exit Bye |
続いて上記で設定したcactiuserのパスワードをconfigファイルに反映します。
# vi /usr/share/cacti/include/config.php $database_password = "xxxxxx"; |
次に所定のSQL文を以下のコマ ンドで流し込みます。
# mysql -u cactiuser -p cacti < /usr/share/doc/cacti-0.8.8b/cacti.sql Enter password: [ cactiuserのパスワード ] |
cactiのcron関連スクリプトが 5分ごとに実行されるのですが、コメントアウトされているのでそれを外しておきます。
# vi /etc/cron.d/cacti */5 * * * * cacti /usr/bin/php /usr/share/cacti/poller.php > /dev/null 2>&1 |
設定変更後、cronを再起動しておきます。
# systemctl restart crond.service |
■Apacheの設定
デフォルトではローカルホストからのみcactiにアクセスできるようになっていますので他ホストからもアクセスできるようapacheの設定を変更します。
# vi /etc/httpd/conf.d/cacti.conf

<省略>
<Directory /usr/share/cacti/>
        <IfModule mod_authz_core.c>
                # httpd 2.4
                # Require host localhost
              Require all granted
        </IfModule>
        <IfModule !mod_authz_core.c>
                # httpd 2.2
                Order deny,allow
                Deny from all
                Allow from localhost
        </IfModule>
</Directory>
<省略>
|
この状態でApacheを有効化し起動します。
# systemctl enable httpd.service # systemctl start httpd.service |
■phpの設定
次にPHPの設定ファイルを編集します。最低限、以下の2箇所の設定変更が必要となります。
# vi /etc/php.ini // 692行目 default_charset = "UTF-8" // 878行目 date.timezone = "Asia/Tokyo" |
■Cactiの初期設定
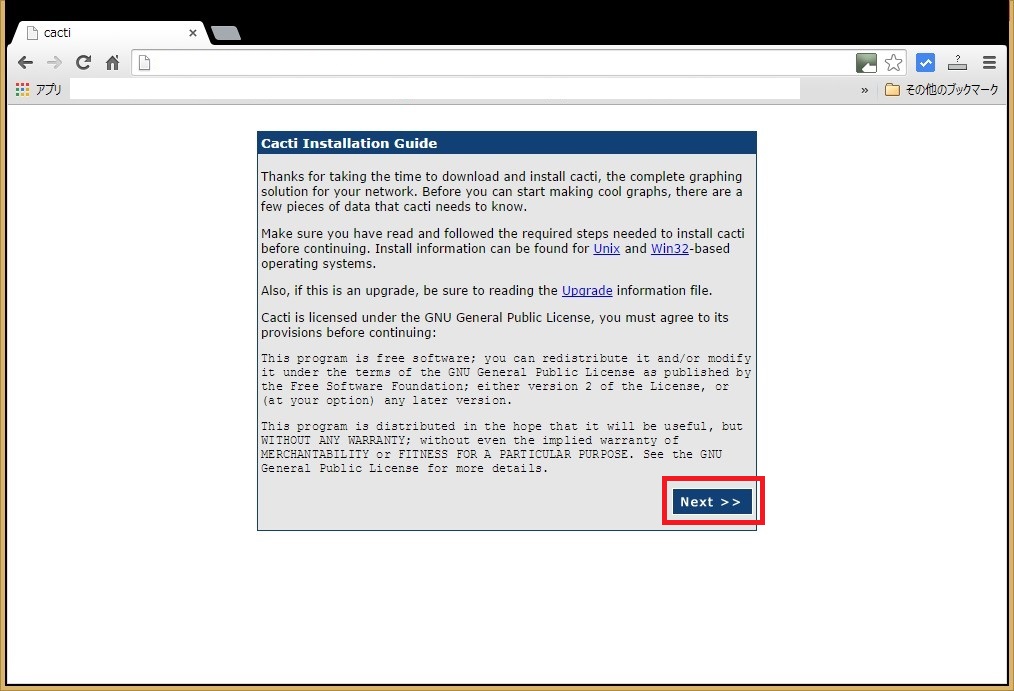
インストールは完了したので以降はブラウザから操作を行います。アクセスURLはhttp://xx.yy.xx.yy/cacti/となります。最初のアクセスでは以下の画面が表示されますので右下のNextボタンをクリックします。
続いて以下の画面が表示されますので同様にNextボタンをクリックします。

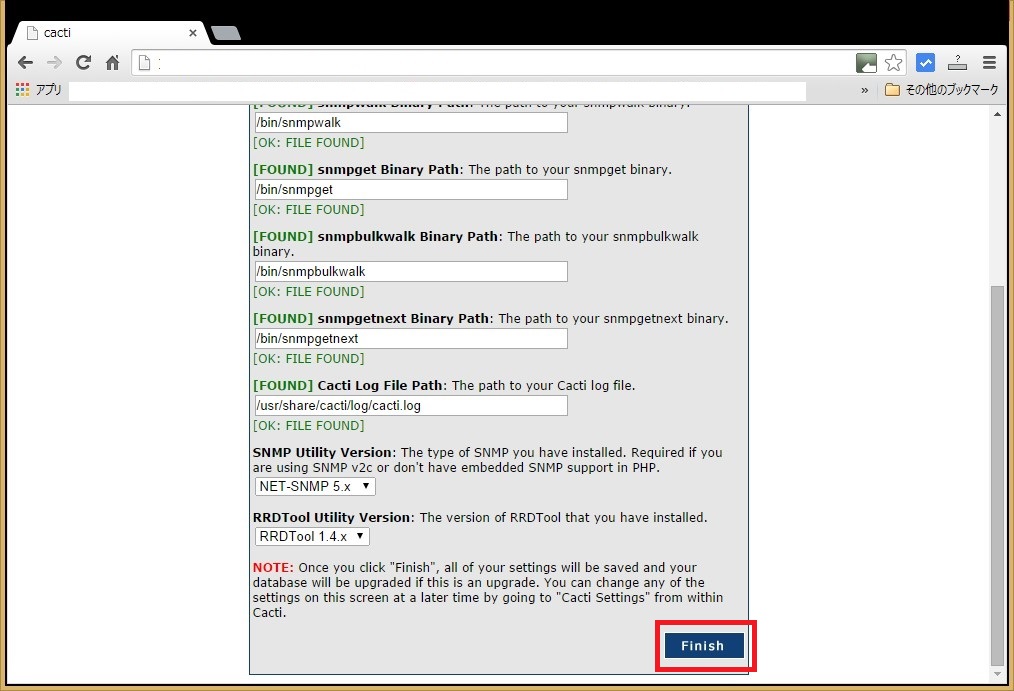
必要なコマンドが存在しているかチェックがかかり問題なければ以下のようにFILE FOUNDと表示されます。普通にyumからインストールすれば問題ないと思いますので最後にFinishボタンをクリックします。
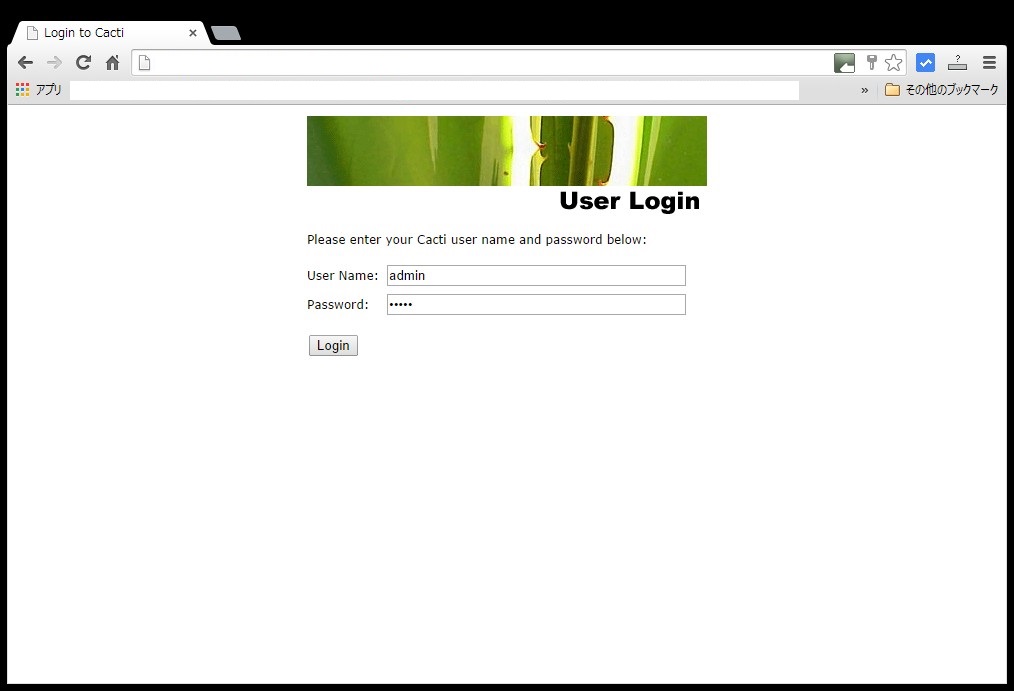
以下のようにログイン画面が表示されます。初期状態では「 admin / admin 」でログイン可能です。
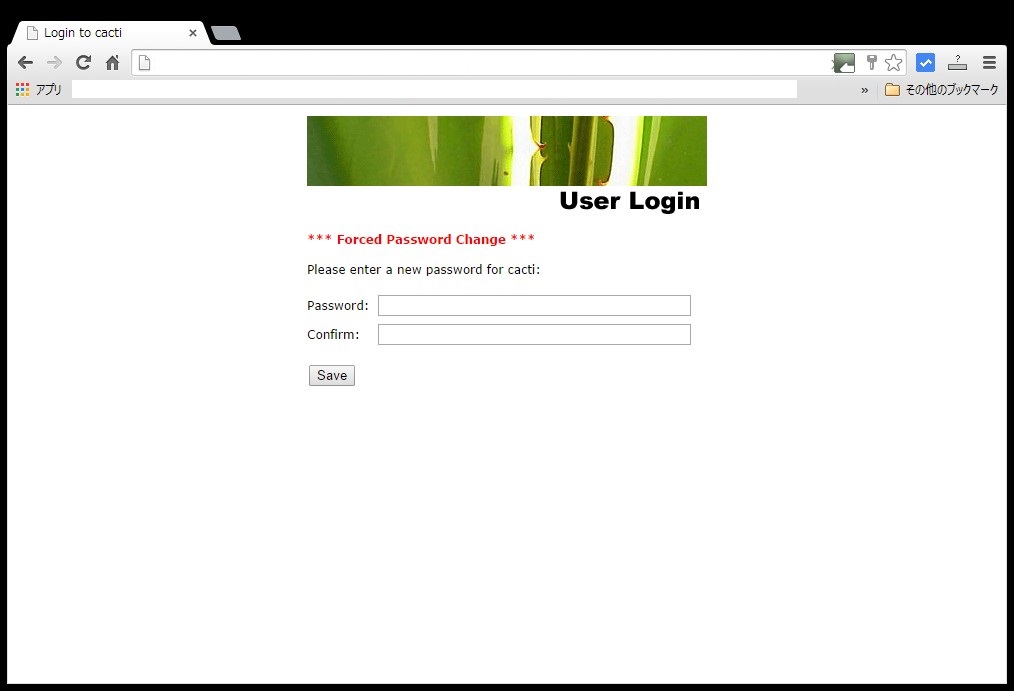
最初のログインの後、パスワードを変更するよう以下の画面が表示されますのでパスワードを設定します。
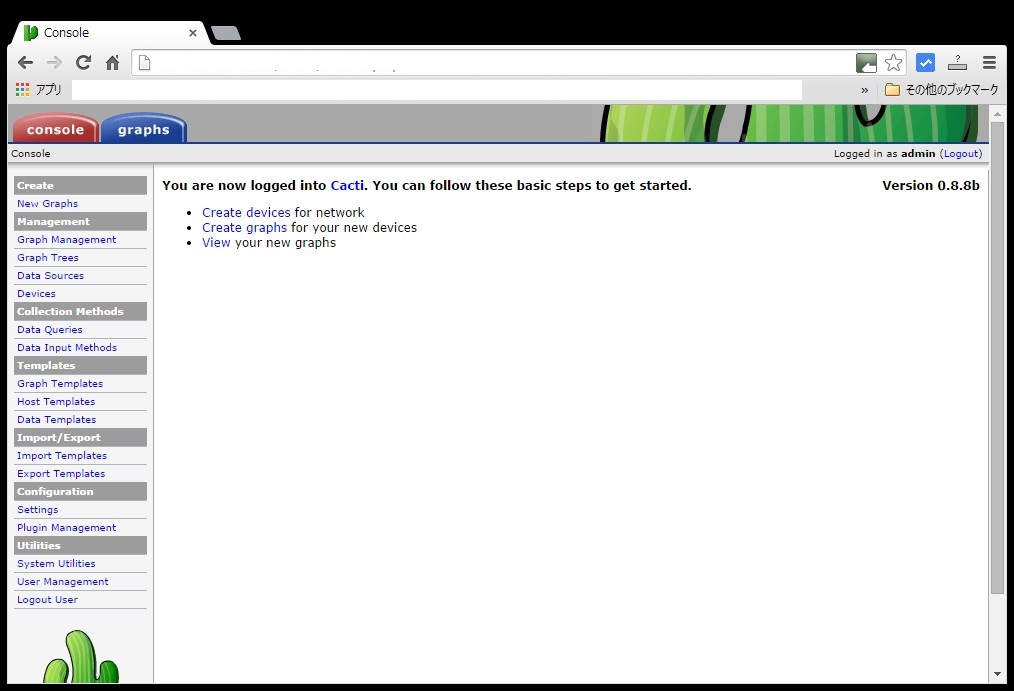
以下がログイン後の画面になります。左上のGraphsタブをクリックすると初期ではlocalhostのみが登録されています。
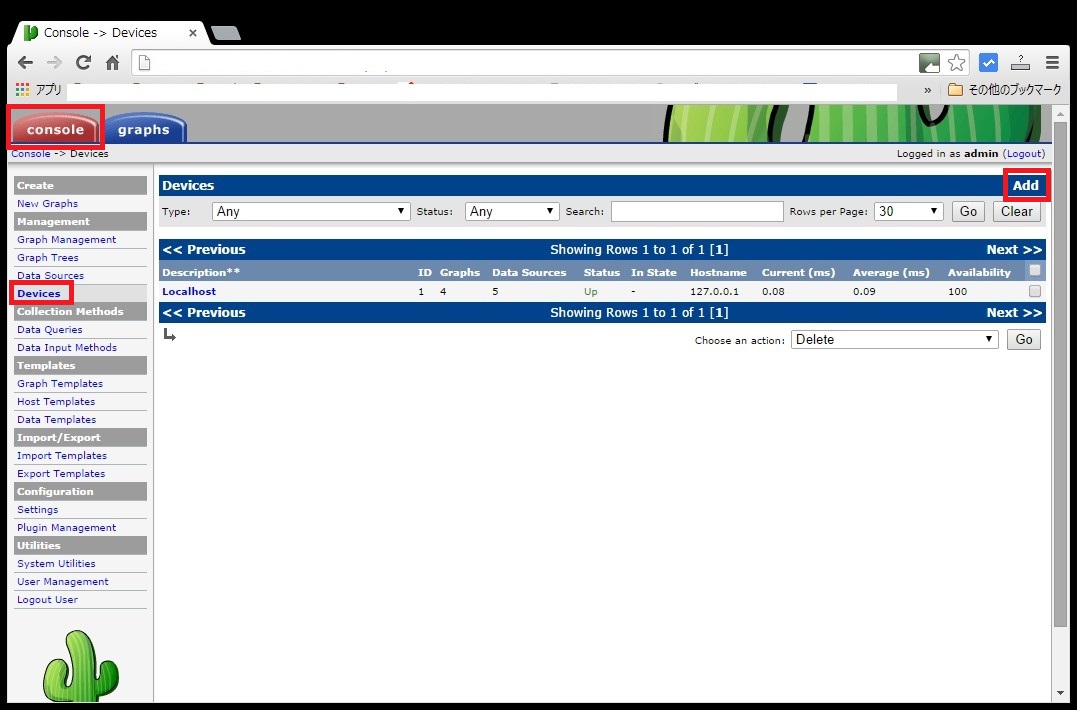
初期ではlocalhostしか登録されていませんのでルータやスイッチまたはサーバなどを登録してリソースを計測したい場合は以下の手順を踏みます。ここではCiscoのスイッチ ( Catalyst ) をを登録し、各インターフェイスのトラフィック流量を計測する場合を記載します。対象のCatalystはSNMPが有効になっているのが前提です。
「Console」-「Devices」を選択し、右上のAddボタンをクリックします。
登録する監視対象の名前やIPアドレス、SNMP Versionなどを入力する画面が表示されますのでそれぞれを入力し、右下のCreateボタンをクリックします。ここではCatalystを登録しますのでHost TemplateのところはCisco Routerを選択します。
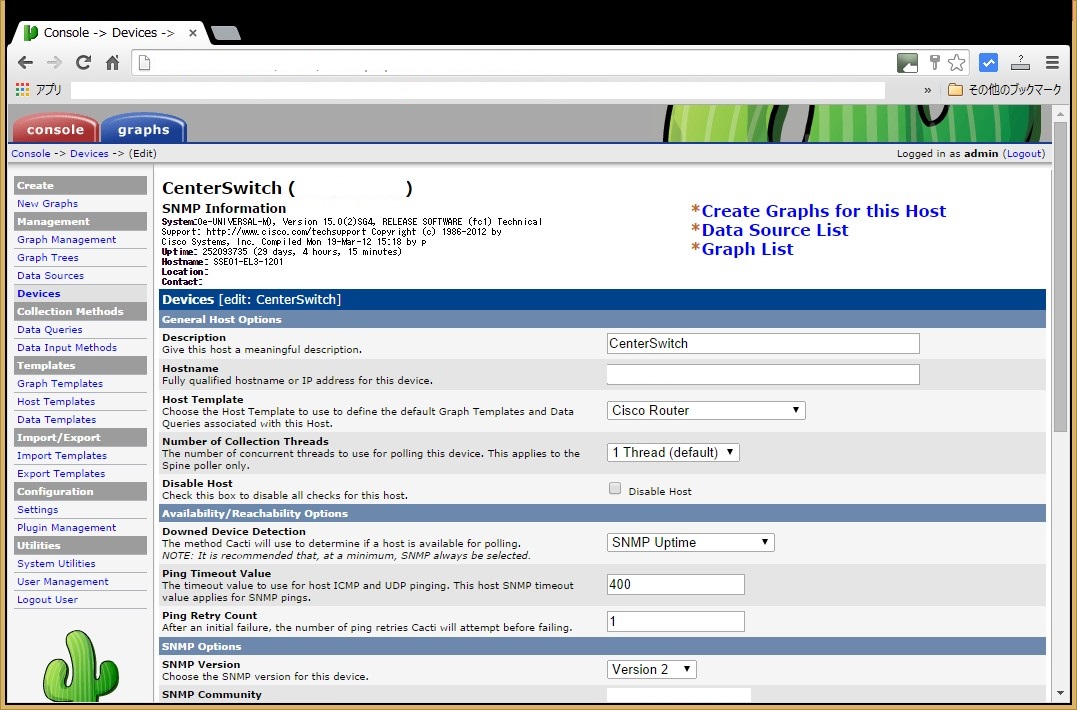
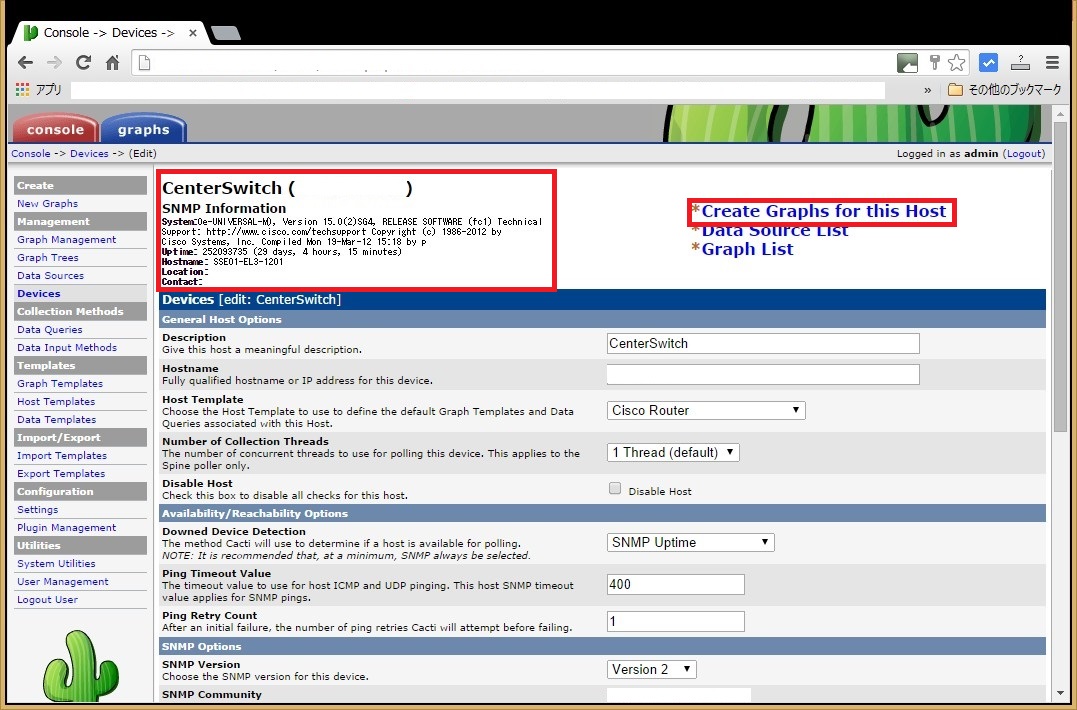
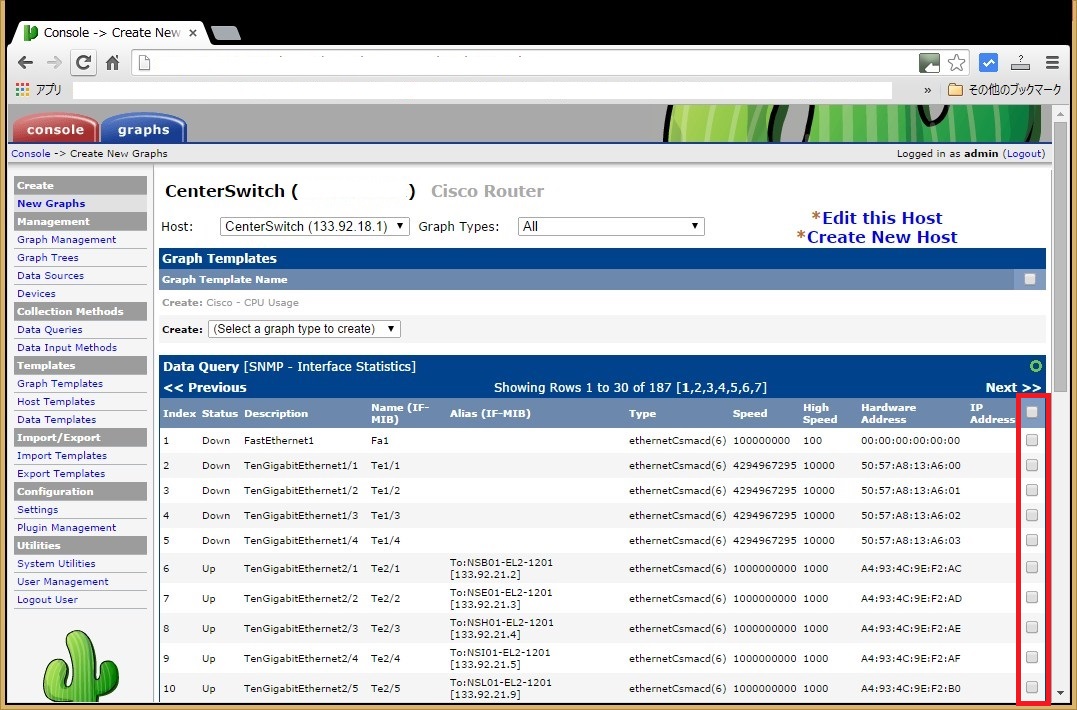
SNMPアクセスが問題なければ下記のようにホストに関する情報が表示されます。続けてグラフを生成するために「Create Graphs for this Host」リンクをクリックします。
以下の画面でどの項目のグラフを生成するのか、対象とする項目の右側のチェックボックスにチェックを入れ右下のCreateボタンをクリックします。
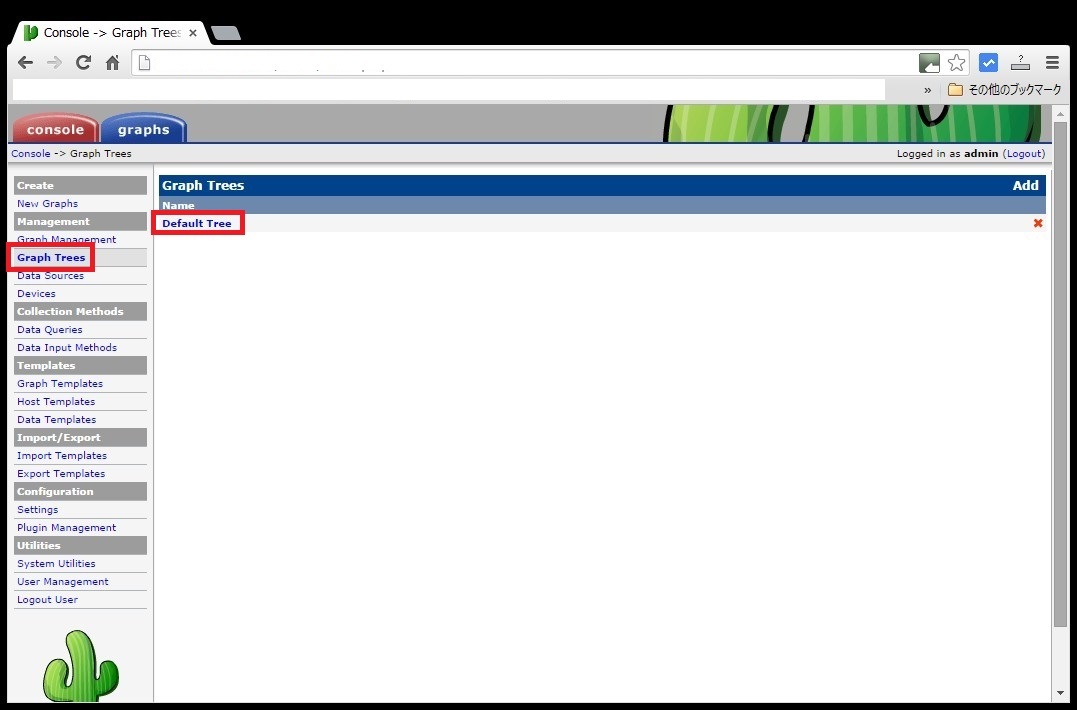
グラフの生成が開始されますので、それが見えるようグラフを実際のツリーに追加します。左メニューの「Graph Trees」選択し、デフォルトで存在するDefault Treeを選択します。ここの場合、この配下に作成されることになりますが、Treeを任意で作成しその配下に追加することも可能です。
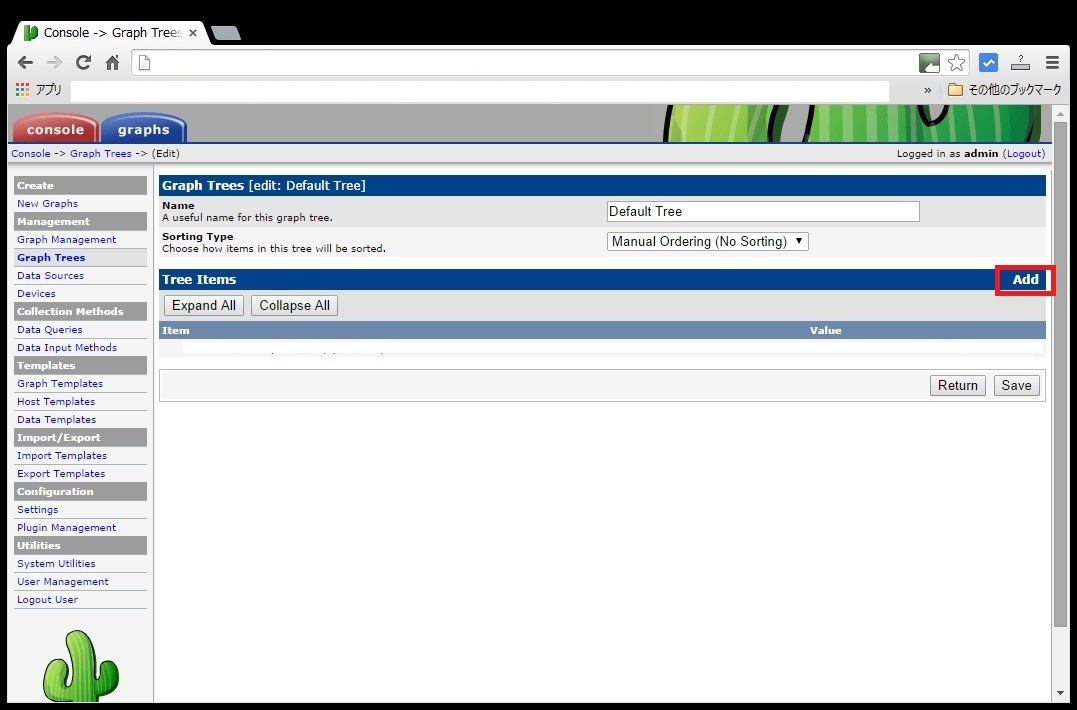
画面右の「Add」ボタンをクリックします。
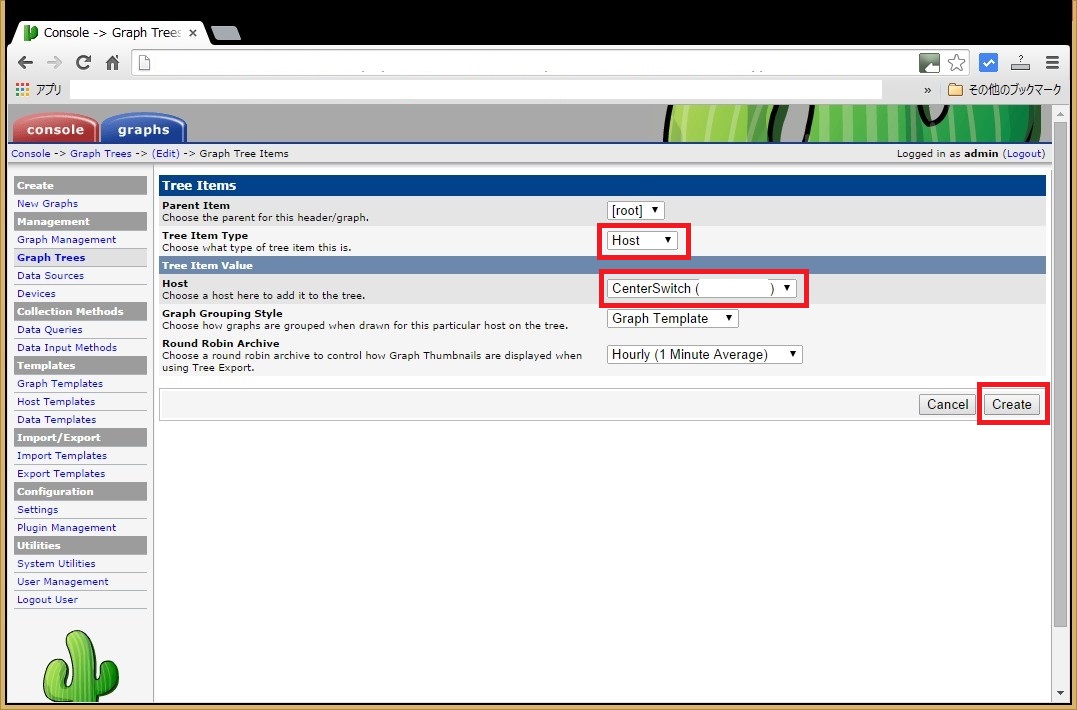
Tree Item TypeにHostを選択し、先ほど作成したホストを選択してCreateボタンをクリックします。
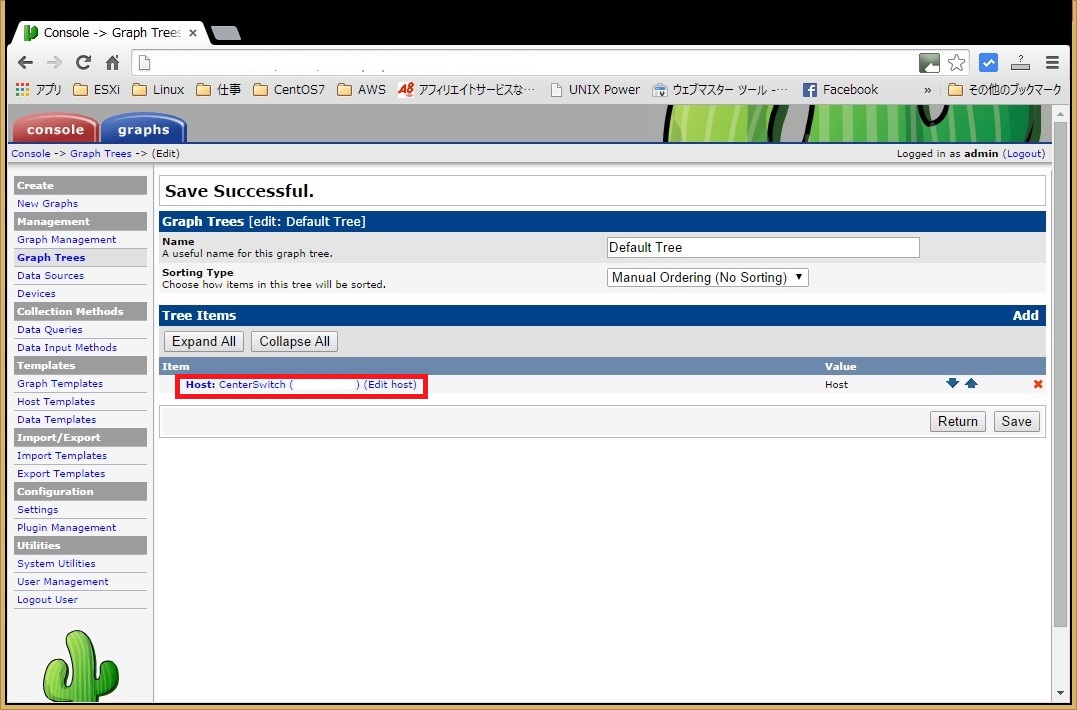
下記の画面より新規に登録されたことが確認できます。
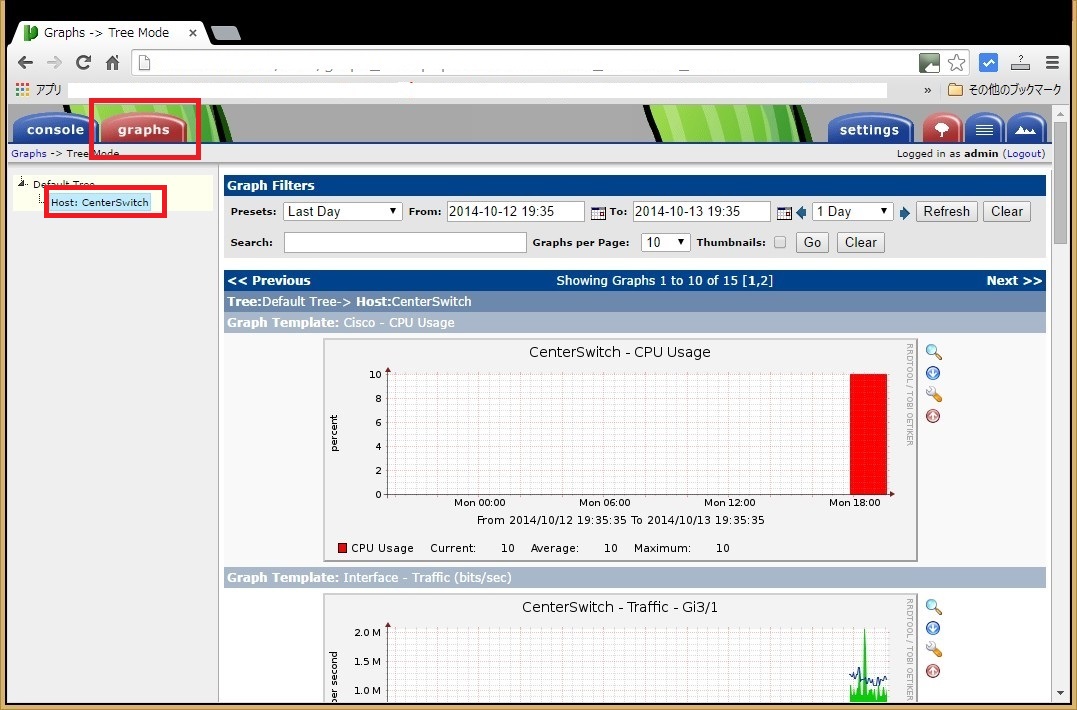
左上のgraphsから左側メニューのHostを選択すると右側の画面にグラフが閲覧できます。
標準ではcactiに限定的なテンプレートが用意されていますが、海外メーカーのネットワーク機器であれば大抵誰かがそれ用のテンプレートを作成しています。オープンソースのいいところですね。私の場合、CiscoASA / PaloAlto / WLC5508など個別にテンプレートをダウンロードしてきてインポートし活用しています。テンプレート集は下記サイトからアクセスできます。
http://www.debianhelp.co.uk/cactitemplates.htm
上記にあるものが全てというわけではなくググるとでてくるものもたくさんありますし、技術があれば自分で作成することも可能です。